Welcome to djgaston.com

Category: Animals & Pets

Pet emergencies, pests and backyard critters.

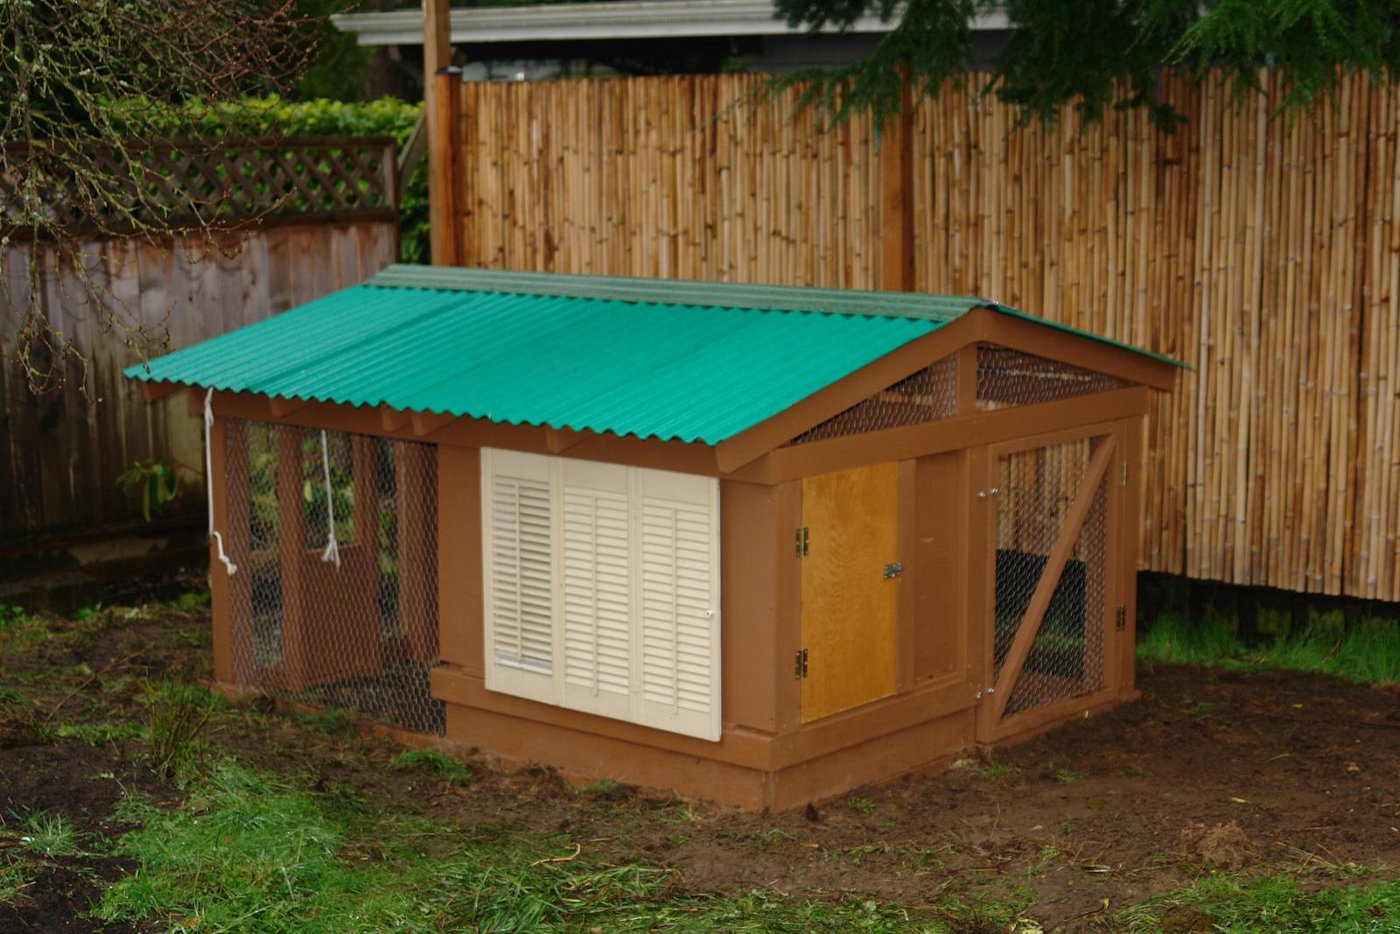
Backyard Chickens: The Basics

Keeping chickens is a lot of fun, and fresh eggs every morning sure don’t hurt.

Quick answer Check your local rules first (many towns ban roosters). Give hens a secure coop with at least 3 square feet each plus a run, or 8 to 10 square feet each if they’re kept inside. Provide one nest box per four hens, roost space, clean water daily, and a complete layer feed (about 16% protein) once they’re about 18 weeks old. Wash your hands after every visit.
Backyard Chickens: The Basics
Photo: Josh Larios from Seattle, US / Wikimedia Commons, CC BY-SA 2.0
Tools & materials

  • Predator-proof coop and run
  • Roost bars and nest boxes
  • Feeder and waterer
  • Starter, grower, then layer feed
  • Oyster shell and grit
  • Pine shavings for bedding
  • Dedicated coop shoes and work gloves

Steps

  1. Check the rules. Look up your city or county ordinances on chickens and roosters before you buy.
  2. Buy healthy birds. Get chicks from a hatchery in the USDA National Poultry Improvement Plan (NPIP). Pick birds that are bright, alert and active.
  3. Give them room. At least 3 square feet per bird inside the coop if they have a run, or 8 to 10 square feet per bird with no outdoor access.
  4. Roosts and nests. Give each bird about 6 to 8 inches of roost bar. Add one nest box (about 12 by 12 inches) for every four hens, off the floor and away from the roosts.
  5. Feed by age. Chicks get a starter feed (about 18 to 20% protein) for the first 6 to 8 weeks, then a grower feed. Laying hens over about 18 weeks get a complete layer feed of about 16% protein, with oyster shell and grit offered separately.
  6. Water every day. Clean the waterer and give fresh water daily. Going without water can stop egg production.
  7. Keep it clean and dry. Keep 3 to 4 inches of shavings on the floor, and remove wet litter.
  8. Collect eggs at least once a day, twice if you can. Throw out cracked eggs. Brush or rub dirt off with a dry cloth rather than washing warm eggs in cold water, and refrigerate them. Cook eggs until the white and yolk are firm.
  9. Quarantine newcomers. Keep new birds apart from your flock for at least 30 days.
  10. Watch for sickness. Call a poultry vet or your county extension office if birds eat or drink less, have runny droppings, sneeze or struggle to breathe, lay fewer or odd eggs, or die suddenly.
Safety: Chickens can carry Salmonella even when they look healthy. Wash hands with soap and water after touching birds, eggs, feed or anything in the coop. Keep coop shoes outside, keep birds out of the house, don’t kiss or snuggle them, and don’t let children under 5 handle chicks or chickens.

How to Get Rid of Fruit Flies

Fruit flies are annoying, but once you find where they’re coming from they’re easy to beat.

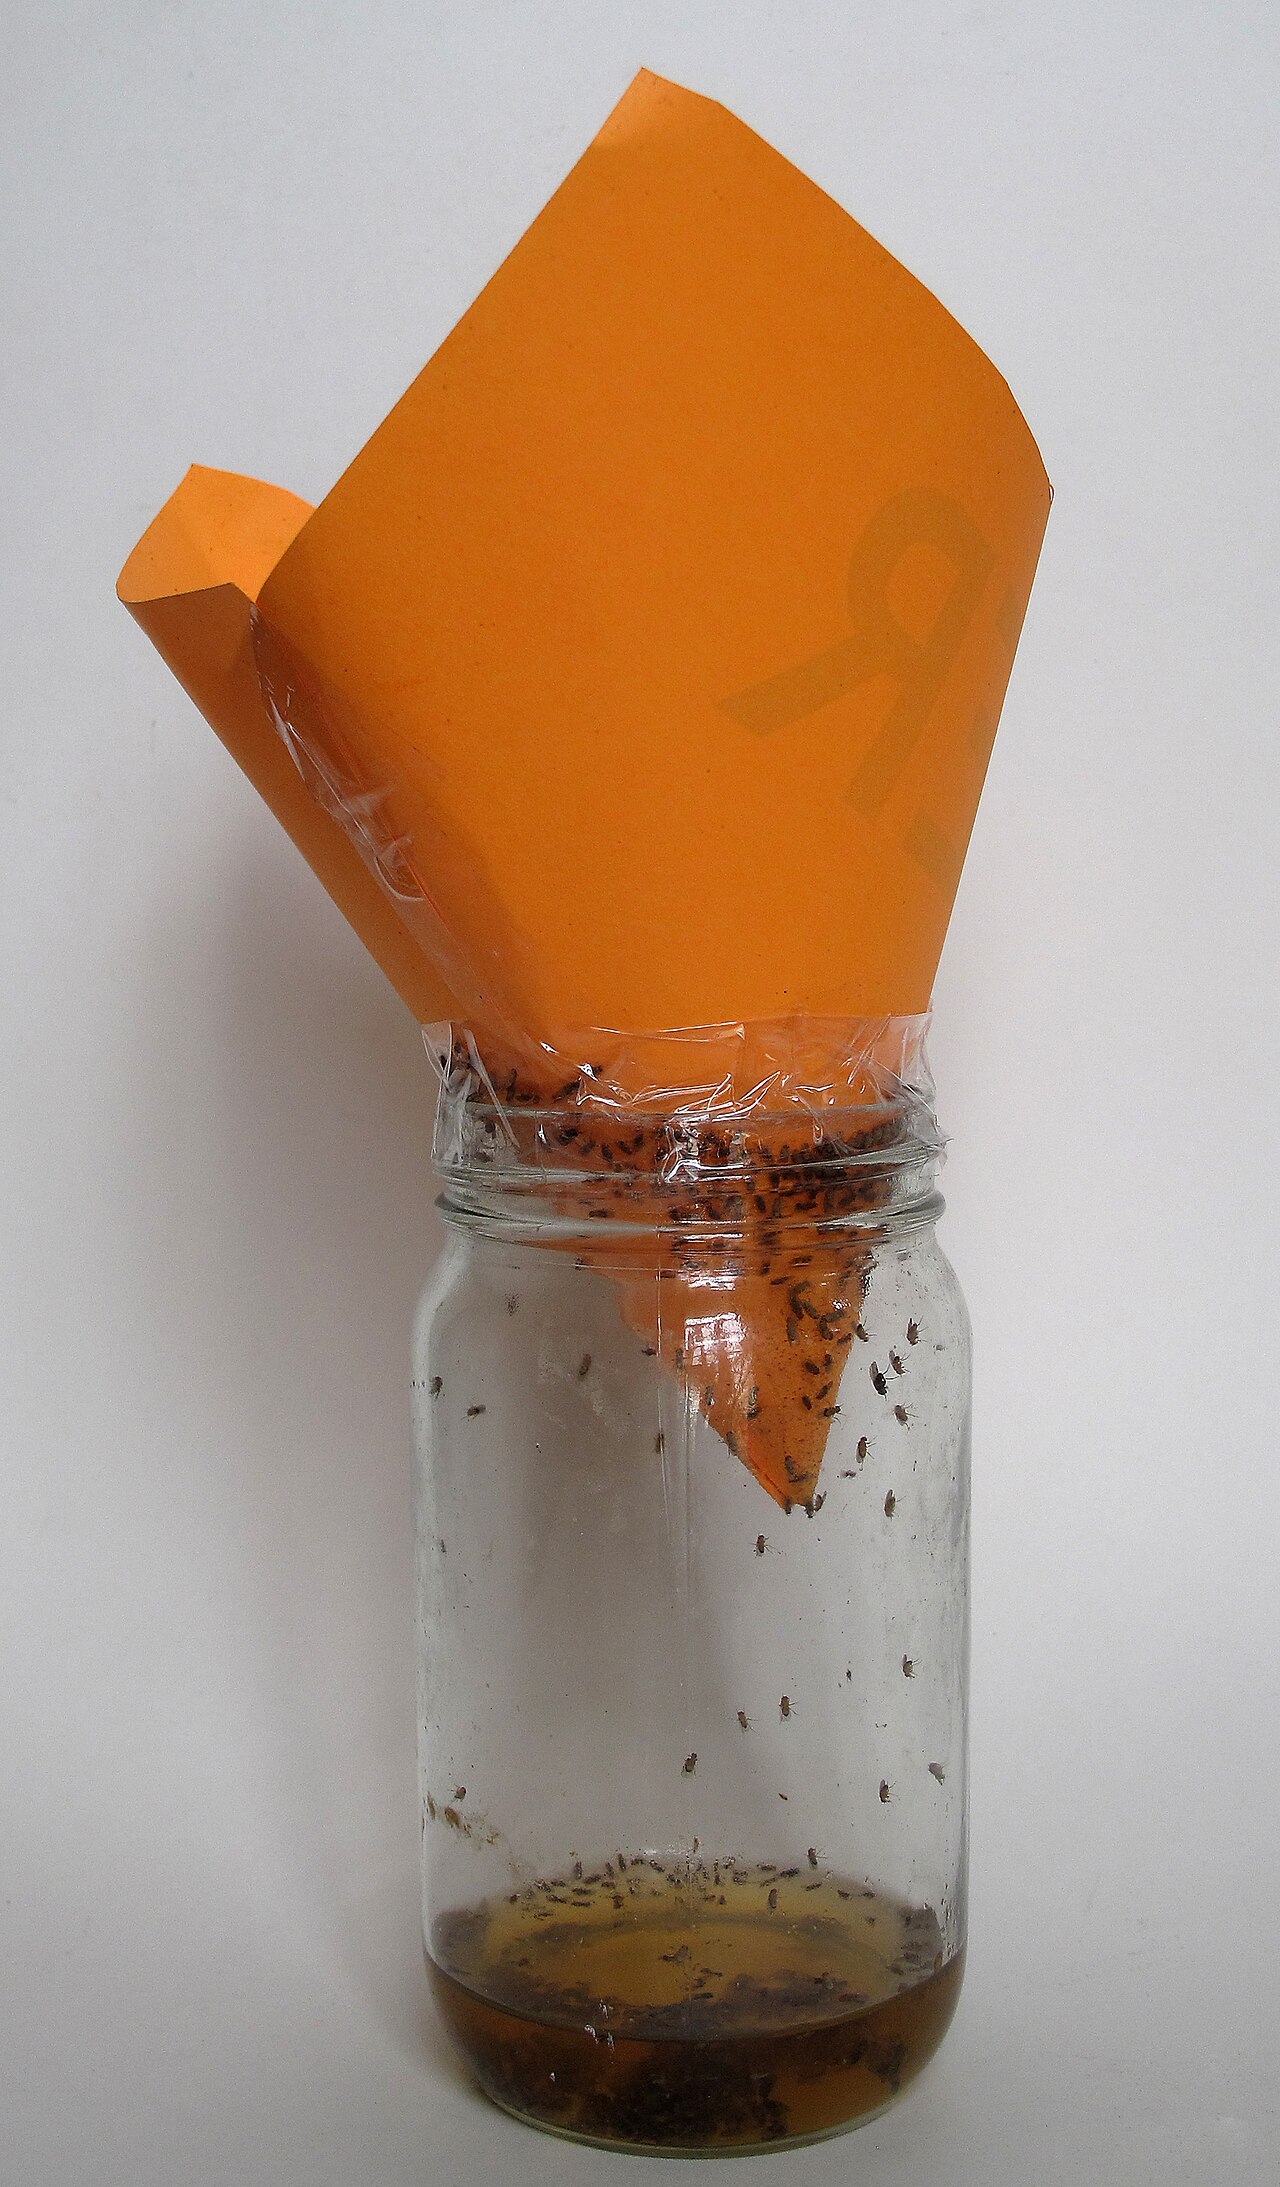
Quick answer Find and remove where they breed: overripe produce, the trash and recycling bins, sticky spills, damp mops and rags, and gunky drains. Then catch the leftover adults with a cider-vinegar trap: a little vinegar, a drop of dish soap, and plastic wrap with small holes poked in it.
How to Get Rid of Fruit Flies
Photo: Downtowngal / Wikimedia Commons, CC BY-SA 3.0
Tools & materials

  • Apple cider vinegar
  • Dish soap
  • Small jar or glass, plastic wrap, rubber band
  • Stiff drain brush
  • Clear plastic bag or wrap (to test drains)

Steps

  1. Refrigerate ripe fruit, or toss anything overripe or damaged. Check potatoes and onions for a soft one.
  2. Empty and rinse the trash, compost and recycling (bottles and cans especially). Wipe up spills under appliances.
  3. Wash or replace damp mops, sponges and rags.
  4. Test the drains: tape clear plastic over each drain overnight. Flies stuck underneath in the morning mean that drain is a breeding spot.
  5. Scrub the inside of that drain with a stiff brush, then flush with hot water to clear the film they breed in.
  6. Trap the adults: pour about 1/2 inch of cider vinegar in a jar with a drop of dish soap. Cover with plastic wrap, poke a few small holes, and set it where they gather. Empty and refresh it every few days.
  7. Keep at it for a week or two. The point is to break their breeding cycle.

Bug spray won’t solve this. As long as the breeding spot is there, new flies keep hatching.

My Dog Ate Chocolate: What to Do Now

If your dog just got into chocolate, take a breath. Here’s exactly what to do, in order.

Quick answer Call your veterinarian or the ASPCA Animal Poison Control Center at (888) 426-4435 now (a consultation fee may apply). Have these ready: your dog’s weight, the kind of chocolate, about how much was eaten, and when. Darker chocolate is more dangerous. Don’t make your dog vomit unless a vet tells you to.
My Dog Ate Chocolate: What to Do Now
Photo: Rob Hanson / Wikimedia Commons, CC BY 2.0
Tools & materials

  • The wrapper or packaging
  • Your dog’s approximate weight
  • Your vet’s number, or the nearest emergency vet

Steps

  1. Get your dog away from any chocolate that’s left.
  2. Figure out what kind it was. Baking chocolate, cocoa powder and dark chocolate are the most dangerous. Milk chocolate is less so, and white chocolate has very little of the toxic stuff, though it’s still fatty.
  3. Estimate how much is missing and note the time.
  4. Call your vet or ASPCA Animal Poison Control at (888) 426-4435 and follow their instructions.
  5. Watch for vomiting, diarrhea, restlessness, panting, heavy thirst or peeing, racing heart, tremors or seizures. Signs often show up within several hours and can last a day or more.
  6. If there are tremors, seizures, collapse or trouble breathing, go to an emergency vet now.
My Dog Ate Chocolate: What to Do Now
Photo: Mx. Granger / Wikimedia Commons, CC0
Safety: Don’t give home remedies, and don’t make your dog vomit unless a vet tells you to. Chocolate contains theobromine and caffeine, which dogs process slowly. Small dogs and dark chocolate are the riskiest mix. Cats are affected too.

This is general information, not veterinary advice. When in doubt, call.