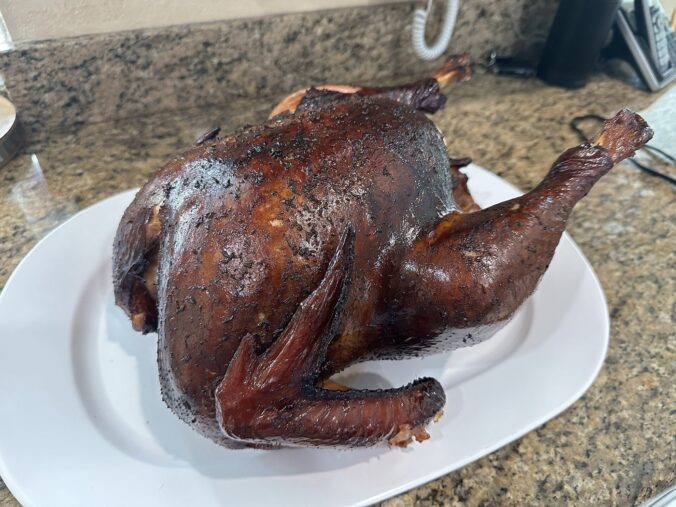
When people ask me how to get a smoked turkey or chicken to come out juicy, my answer is always the same: the key is the prep. A brine does wonders for chicken and turkey. Most of the work happens a day or two before the bird ever sees smoke, and if you get the prep right, the smoker part is mostly just keeping the fire steady and trusting your thermometer.
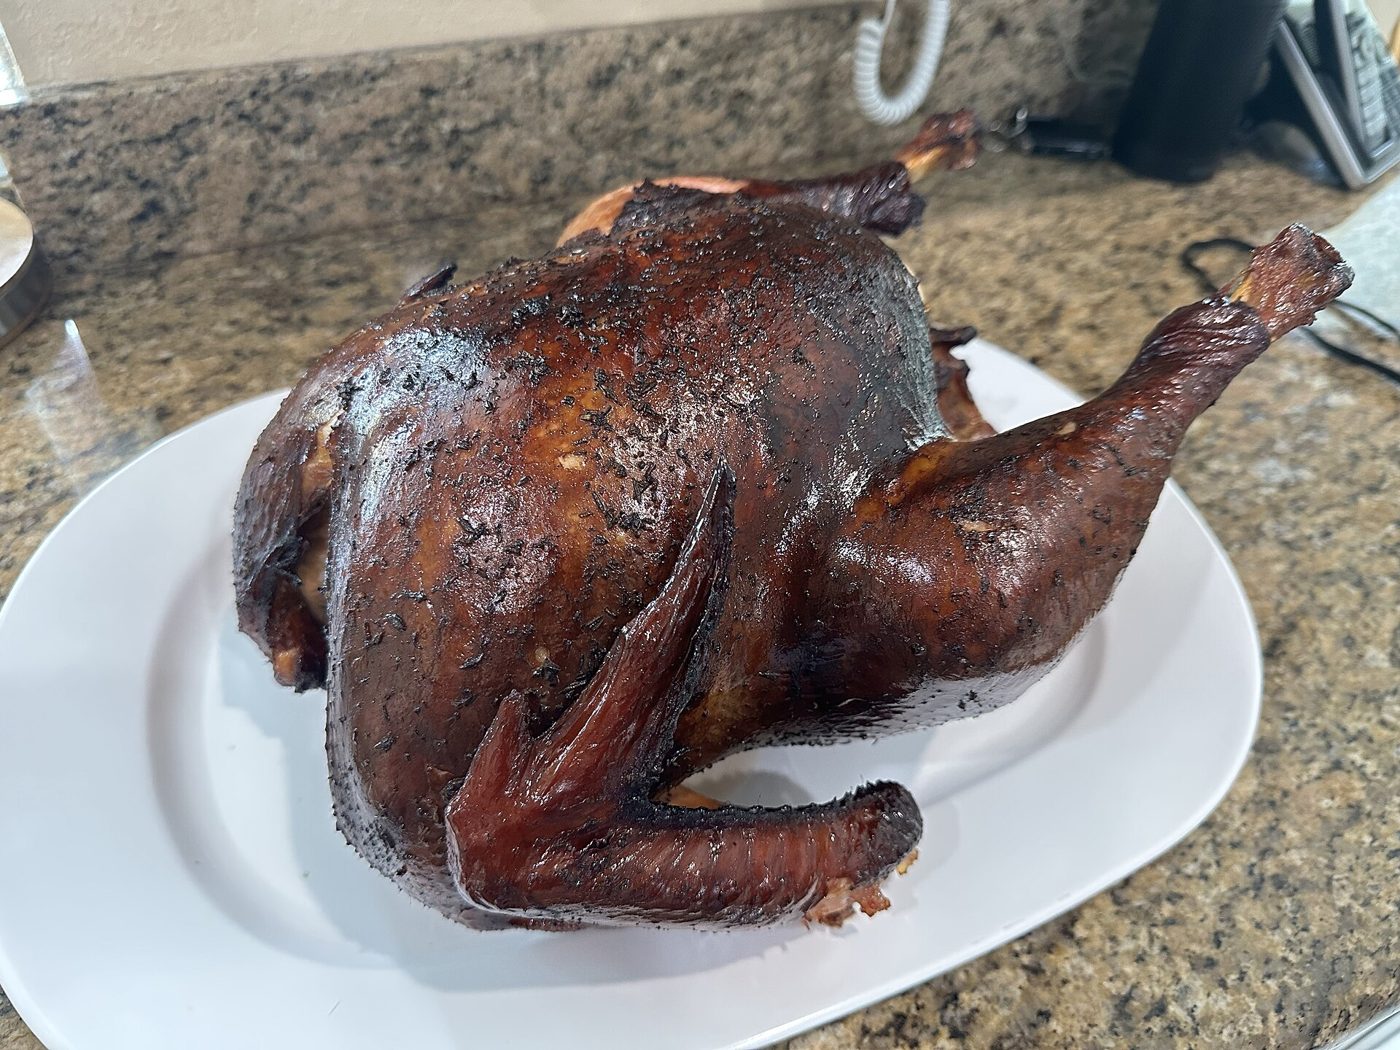

- A fresh or fully thawed turkey (8 to 12 pounds is the USDA’s suggested size for smoking) or a whole chicken
- Salt: plain table salt for the USDA ratio, or kosher salt if you weigh it (see the salt note below)
- Brown sugar or honey (optional)
- A food-grade brining bag, or a food-grade plastic, stainless steel or glass container with a lid that fits in your fridge
- Two thermometers: one for the meat (a leave-in probe, an instant-read, or both) and one for the smoker’s air temperature
- A smoker, or a covered charcoal or gas grill set up for indirect heat
- A drip pan for water
- Wood chips or chunks: hickory, apple or maple are the USDA’s picks for smoke flavor
- Paper towels, a sheet pan with a rack, and heat-proof gloves
Step 1: Pick the right bird
Smaller is better for smoking. The USDA’s chart for alternate ways to cook a turkey lists 8 to 12 pounds for a smoked turkey, at roughly 20 to 30 minutes per pound. A big 20-pounder spends a long time warming up through the “danger zone” at low smoker temperatures. If you’re feeding a crowd, two smaller birds, or a turkey plus a bone-in turkey breast, work better than one giant one.
Now read the label. If it says kosher, self-basting, “enhanced,” “basted” or “for flavoring,” the bird has already been injected or salted. USDA says a solution of up to 3% of the weight can be added to bone-in poultry. Don’t brine those birds again or you’ll end up with a salty turkey. Skip straight to Step 4 and season the outside lightly. For a brine, start with a plain, natural, un-basted bird.
Step 2: Thaw it the safe way
A frozen bird has to be completely thawed before it goes in brine or on the smoker. The USDA’s guide on thawing turkeys is the best plan to follow:
- Refrigerator (best): about 24 hours for every 4 to 5 pounds, in a fridge at 40°F or below. That’s 1 to 3 days for a 4- to 12-pound turkey and 3 to 4 days for 12 to 16 pounds. Put it in a pan so the juices don’t drip on anything.
- Cold water (faster): about 30 minutes per pound, still in its leak-proof wrapper, fully under cold tap water. Change the water every 30 minutes, and cook it right away once it’s thawed. That last part matters for brining: a cold-water-thawed bird can’t sit in a brine overnight, so use the fridge method if you plan to brine.
- Never on the counter, in the garage, on the back porch or in the truck bed.
Thanksgiving tip: count backward. For a 12-pound turkey you want it in the fridge about 3 days before you brine, plus a day for the brine. Buy early.
Also, don’t wash the bird. USDA says washing raw poultry just splashes germs around the sink and counter. Take the neck and giblet bag out of the cavity and move on.
Step 3: Brine it (wet or dry)
Wet brine
- Mix the brine. The USDA’s ratio is 3/4 cup of table salt per gallon of water, or 3 tablespoons per quart. Stir until the salt is completely dissolved. Sugar is optional. A common addition is a little brown sugar or honey, about 1/2 cup per gallon, which also helps the skin brown. If you heat the brine to dissolve things or steep spices (black pepper, garlic, bay leaves, a little rosemary), cool it all the way down before the bird goes in.
- Figure how much you need. You need enough to cover the whole bird. An easy way to check: put the bird in the bag or container, add plain water to cover, then pull the bird out and measure the water. Make that much brine.
- Submerge and cover. USDA suggests putting the bird breast-down in the container, covering it completely with brine, and closing it up tight so nothing splashes around the fridge.
- Keep it cold. It has to stay at 40°F or below the whole time. Overnight is plenty for a turkey or a whole chicken. USDA’s limit is 2 days, and any longer and you’d be past the safe window for a thawed bird anyway. Chicken pieces need less time, a few hours.
- Pull it, dump it. Take the bird out and throw the brine away. Never reuse it.
No room in the fridge? A clean cooler works if you can keep it cold. Serious Eats suggests freezing a few water-filled 2-liter bottles and swapping them in every few hours to keep the brine under 40°F. Put a thermometer in the brine and actually check it. If it creeps above 40°F, it’s not safe. USDA’s own advice is the refrigerator, so use the cooler only when you can watch it.
A note on salt. Salts aren’t the same by the cup. Kosher salt flakes are bigger and lighter than table salt, and different brands weigh different amounts per cup, so swapping cup-for-cup changes how salty your brine is. If you use kosher salt, go by weight. 3/4 cup of table salt works out to roughly 7 to 7 1/2 ounces (about 200 to 215 grams) per gallon. If you use table salt, stick with the USDA measurement and you’ll be fine.
Dry brine (less mess)
A dry brine is just salt rubbed on the bird and given time to work. No bucket, no sloshing. USDA’s method:
- Use 1 tablespoon of kosher salt (or seasoned salt) for every 5 pounds of bird. Add pepper, garlic powder, dried herbs or a little brown sugar if you want.
- Rub it over the whole surface, including under the skin of the breast and around the legs and wings.
- Put it in a food-grade plastic bag, press out the air and seal it. Refrigerate for up to 2 days, and massage the salt into the skin every 8 to 12 hours.
- Take it out, pat it dry with paper towels and cook it.
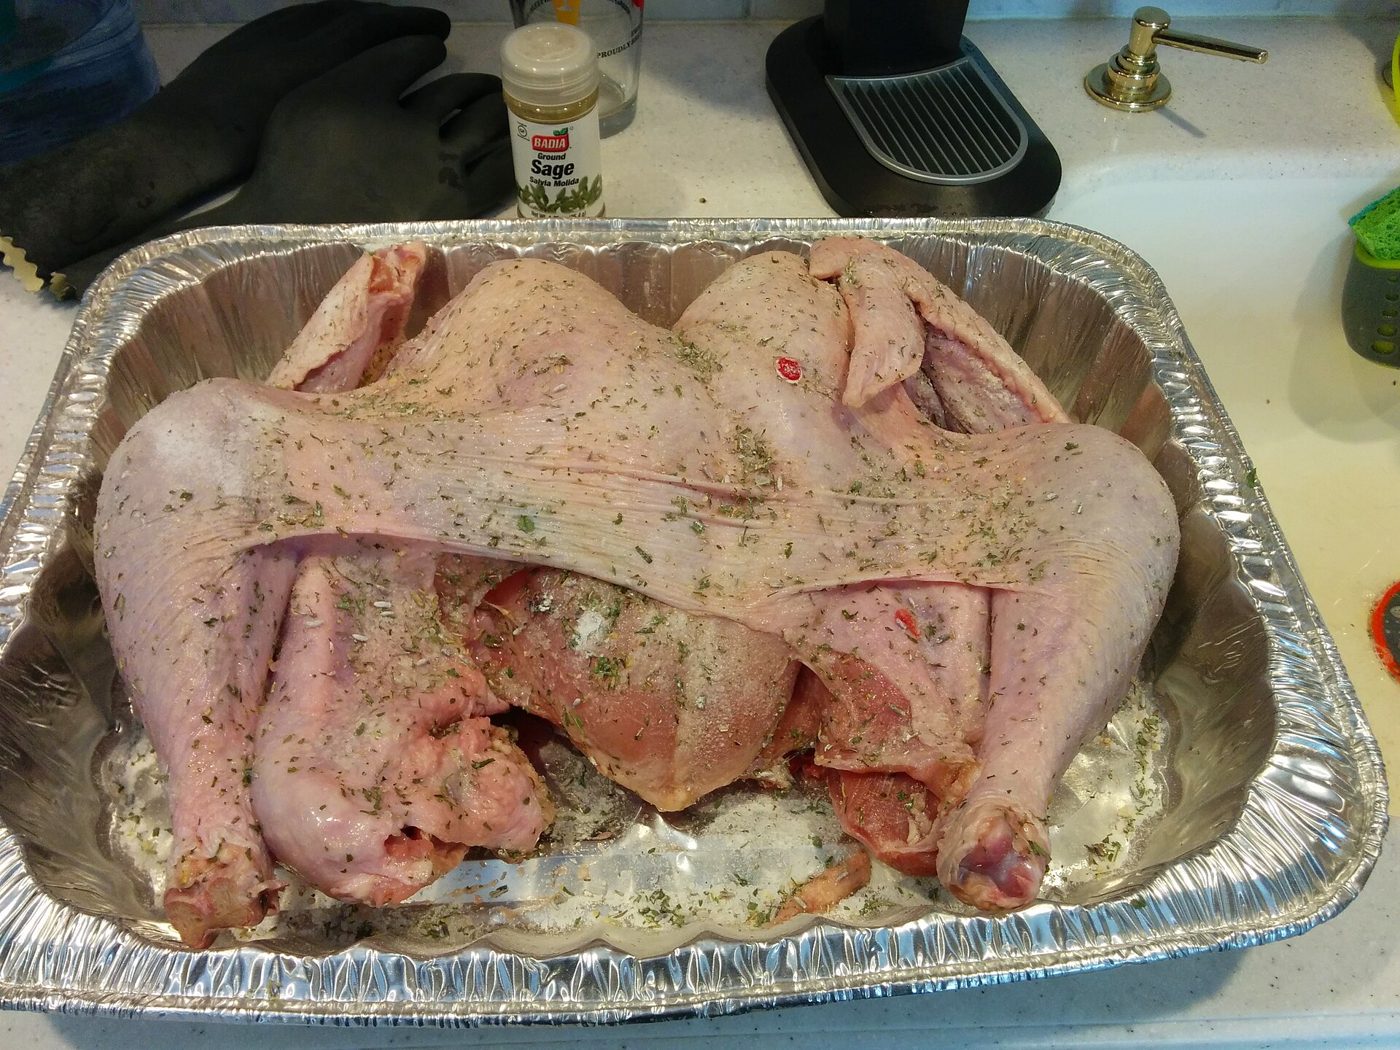

Step 4: Dry the skin and season
Smoked poultry skin has a reputation for coming out rubbery. Wet skin is a big reason why. After brining, pat the bird dry with paper towels, set it on a rack over a sheet pan and leave it uncovered in the fridge for a few hours or overnight. The skin dries out and browns better.
Then season the outside. If you brined, go easy on salt in the rub, since the meat is already seasoned. A little oil or melted butter on the skin, plus pepper, paprika and garlic powder, is all you need. Tuck the wing tips behind the back so they don’t burn.
Don’t stuff it. USDA says not to stuff a turkey that’s going on a smoker or covered grill. At low temperatures the stuffing takes too long to reach 165°F, and smoked stuffing doesn’t taste good anyway. Cook the dressing in the oven in a pan.
Step 5: Set up the smoker
- Pick a safe spot. Outside, well lit and with good airflow, away from the house, trees and bushes. Use only real fire starters, never gasoline. (Same fire-safety basics as in my campfire guide.)
- Use a real cooker. USDA warns against makeshift smokers like galvanized steel cans, which can leave chemical residue on food.
- Light the charcoal and let it get red-hot with gray ash, about 10 to 20 minutes. On a pellet, electric or gas smoker, preheat per the manual.
- Add a water pan. It catches drips, prevents flare-ups and keeps the air moist.
- Add wood. Hickory, apple and maple all work well with poultry. USDA’s charcoal method is about 1/2 cup of soaked chips at a time. Poultry soaks up smoke fast, so a few handfuls over the first couple of hours are plenty. Thin, light-blue smoke is what you want, not thick white smoke.
- Hold the temperature. Keep the air in the smoker between 225 and 300°F the whole time. For poultry, the upper part of that range, 275 to 300°F, usually works better. It cooks faster and gives you better skin than a low-and-slow brisket temperature. On charcoal, USDA says to plan on adding about 15 briquettes an hour.
Using a regular grill? Bank the coals into two piles with a water pan in the middle, put the bird over the pan, close the lid and leave the vents open. On a gas grill, light one side and put the bird on the side that’s off.
Step 6: Smoke it to temperature, not time
Put the bird in breast-up with a leave-in probe in the thickest part of the breast, not touching bone. Then let the smoker work, and don’t keep opening the lid.
The USDA estimate for a turkey is 20 to 30 minutes per pound at 225 to 300°F, so a 12-pound bird could take anywhere from about 4 to 6 hours. A whole chicken is a lot faster. Weather, wind and your smoker all change the time, which is exactly why the thermometer decides when it’s done.
It’s done when every spot reads at least 165°F: the thickest part of the breast, the innermost part of the thigh, and the innermost part of the wing. Check all three with an instant-read thermometer and keep the tip off the bone.
It’s pink. Is that okay? Usually, yes. USDA says smoked turkey meat is always pink, and smoked poultry can have a pink ring about half an inch deep even when it’s well past 165°F. Color doesn’t tell you whether it’s safe. The thermometer does.
Step 7: Rest, carve and handle leftovers
- Rest the bird loosely tented with foil for about 20 minutes so the juices settle before you carve.
- Carve the breast off the bone and slice it across the grain.
- Two-hour rule: get the leftovers in the fridge within 2 hours (1 hour if it’s over 90°F outside). Cut the meat off the bone into smaller pieces in shallow containers.
- Use it within 4 days or freeze it, and reheat leftovers to 165°F.
Common mistakes
- Brining a pre-salted bird. Check the label for kosher, self-basting or enhanced.
- Starting with a half-frozen bird. It cooks unevenly and spends too long in the danger zone. USDA says thaw completely before smoking.
- Too big a bird. Stick to the 8- to 12-pound range for smoking, or use two birds.
- Wet skin and low heat. Dry the skin overnight and run the smoker hotter (275 to 300°F) for poultry.
- Cooking by the clock. Minutes per pound is just a planning guide. Pull it at 165°F in all three spots.
- Reusing the brine or the raw-meat marinade. Throw out the brine. If you want a sauce to baste with, set some aside before it touches raw meat.
What goes with it
Good sides for smoked turkey or chicken are crispy oven fries, homemade mac and cheese and a pan of cast-iron skillet cornbread. Leftover meat pulls right into a pot of chicken and dumplings (smoked turkey works great in it too), and the rest makes great sandwiches. If your cast iron needs some help before the big day, here’s how to restore and season it.
Sources
- USDA Food Safety and Inspection Service, “Smoking Meat and Poultry”: fsis.usda.gov
- USDA FSIS, “Turkey: Alternate Routes to the Table” (smoking size and time chart, no stuffing): fsis.usda.gov
- USDA FSIS, “Turkey Basics: Safe Thawing”: fsis.usda.gov
- USDA FSIS, “Poultry: Basting, Brining, and Marinating” (wet and dry brine ratios, added-solution labels): fsis.usda.gov
- USDA, “Brining Safely Will Bring Tender, Flavorful Meat to the Thanksgiving Table”: usda.gov
- USDA FSIS, “Is Pink Turkey Meat Safe?”: fsis.usda.gov
- USDA FSIS, “Happy Thanksgiving” food safety tips (two-hour rule, leftovers, where to check the temperature): fsis.usda.gov
- Illinois Extension, “Turkey FAQs” (why not to brine a pre-basted turkey): extension.illinois.edu
- Serious Eats, “How to Brine a Turkey for Thanksgiving” (cooler method with frozen bottles): seriouseats.com
Follow Danny on X: @djgaston19