Welcome to djgaston.com

Month: October 2026 (Page 2 of 4)

What the Internet Was Like in the 1990s

My boys can’t picture a world where getting online meant tying up the phone line. Here’s what it was like.

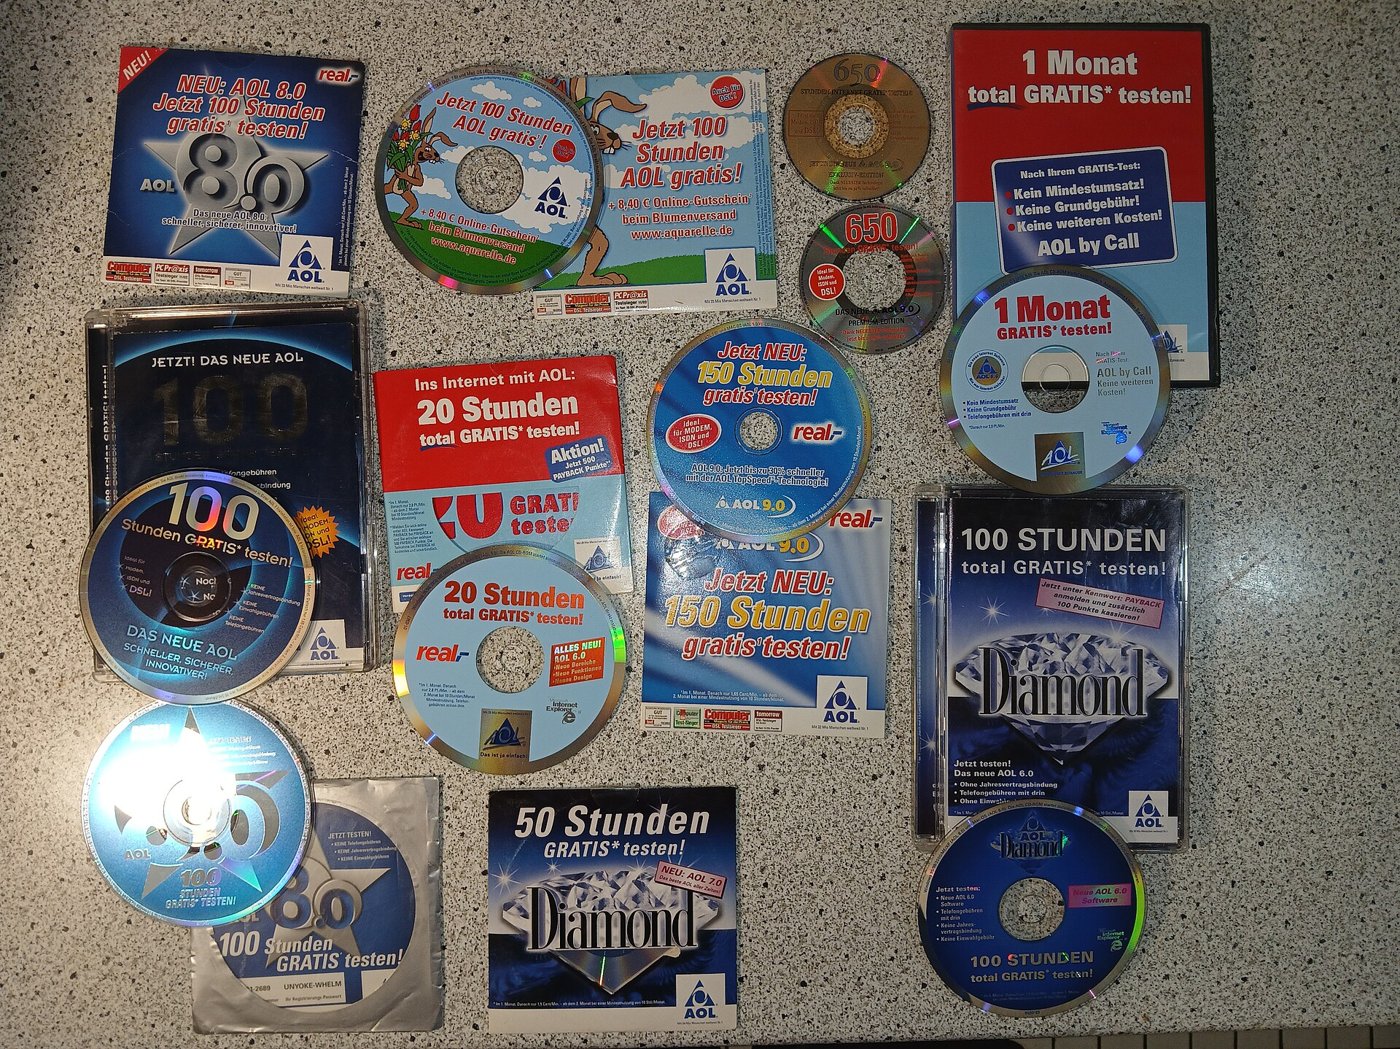
Quick answer Before broadband, you got online with a modem over your home phone line, which meant nobody could call while you were on. People dialed into local bulletin board systems (BBSs), signed up for online services like AOL (whose free-trial disks showed up in the mail), browsed the brand-new World Wide Web with Mosaic and then Netscape, and built their own homepages on GeoCities.
What the Internet Was Like in the 1990s
Photo: Rotkaeppchen68 / Wikimedia Commons, CC0
See it for yourself

  • The Internet Archive’s Wayback Machine (web.archive.org), which has saved much of the old web, including many GeoCities pages

The highlights

  1. Bulletin boards came first. The first dial-up computer bulletin board system, CBBS, was built in Chicago in 1978 by Ward Christensen and Randy Suess. Through the 1980s and into the ’90s, hobbyists ran BBSs where callers could dial in with a modem, leave messages and swap files.
  2. Dial-up was the on-ramp. Your computer’s modem dialed a number over the regular phone line. While you were online, the line was busy for everyone else in the house.
  3. The web got pictures. On April 22, 1993, students at the University of Illinois’ National Center for Supercomputing Applications released NCSA Mosaic 1.0, the first web browser to catch on with the general public. It could show images and text together on the same page. Free Windows and Mac versions followed in late 1993.
  4. Netscape took over. Mosaic’s project leader, Marc Andreessen, and Jim Clark founded the company that became Netscape Communications in 1994. Its Netscape Navigator browser quickly dominated the young web, before losing out to Internet Explorer.
  5. AOL was in every mailbox. America Online mailed out free-trial disks by the millions. The Smithsonian’s National Museum of American History keeps one, a floppy from around 1995 offering 15 free hours.
  6. Everybody got a homepage. GeoCities started in 1995 as Beverly Hills Internet. Users, called “homesteaders,” built free pages in themed neighborhoods like “WallStreet” and “SiliconValley.” At its peak it was the third most popular destination on the web. Yahoo bought it in 1999 for $3.57 billion and shut it down on October 26, 2009.
  7. A lot of it was saved. The nonprofit Internet Archive has been archiving the public web since 1996 and ran a special project to save GeoCities before it closed.
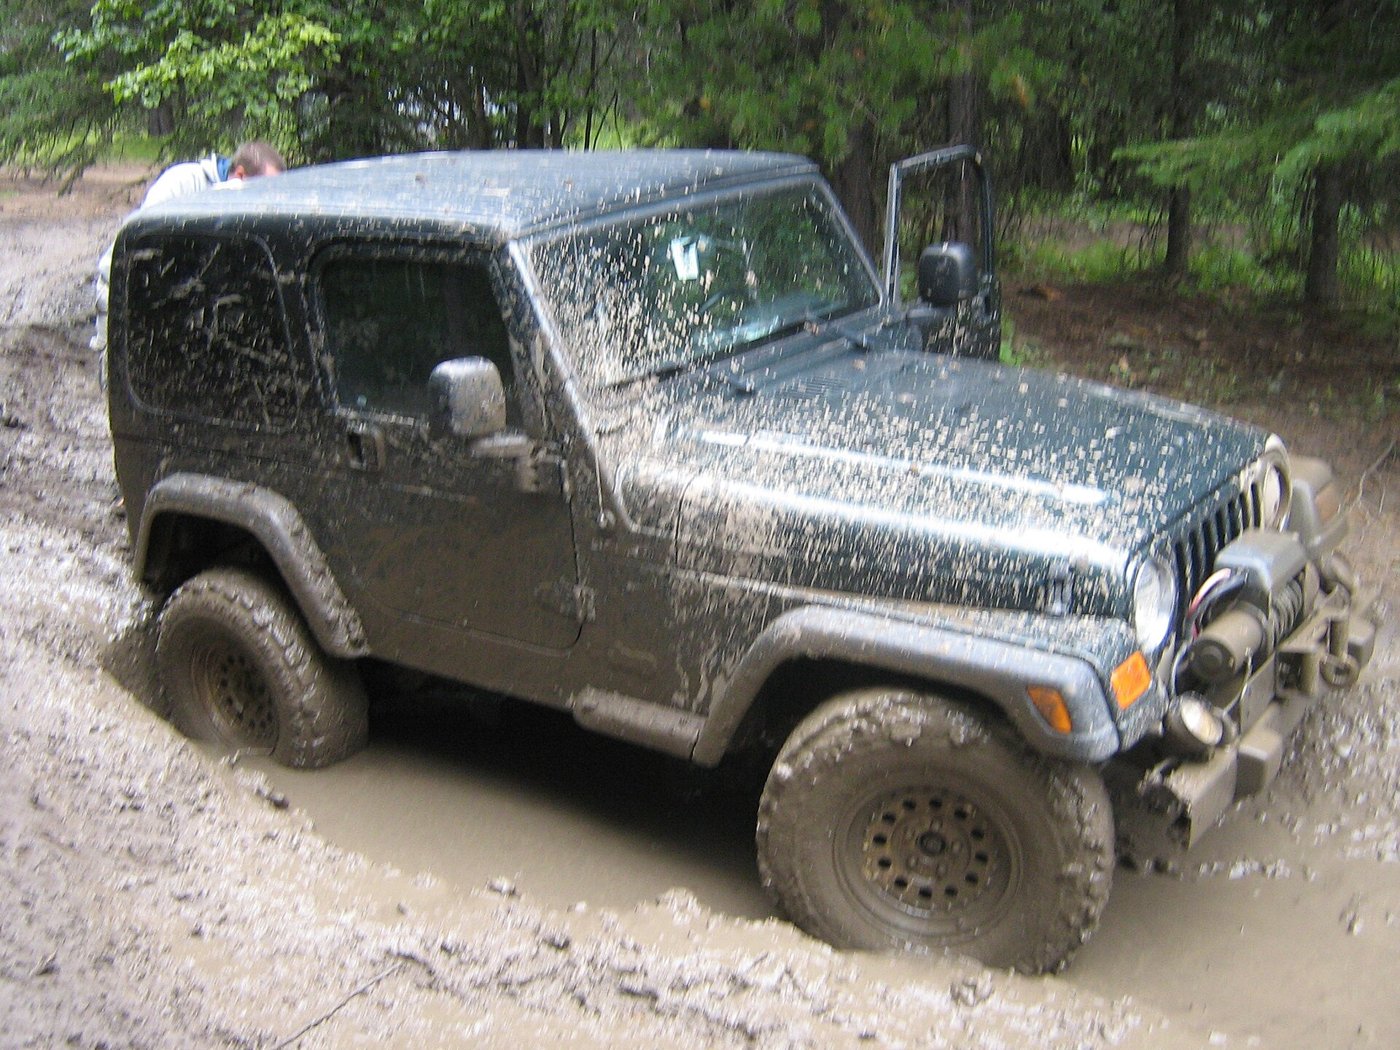

How to Recover a Stuck Truck Safely

If you go off-road long enough, you’re going to get stuck. Getting unstuck without anybody getting hurt is the part that matters.

Quick answer Hook a stretchy recovery (snatch) strap to rated recovery points on both trucks, never to a hitch ball, tie-down or bumper, and never use a chain for a snatch. Drape a damper or heavy blanket over the middle of the strap, get everyone out and well back (at least 1.5 times the strap’s length, and never in line with it), agree on signals, then have the recovery truck take up the slack gently.
How to Recover a Stuck Truck Safely
Photo: dave_7 from Lethbridge, Canada / Wikimedia Commons, CC BY-SA 2.0
Tools & materials

  • Recovery strap rated for your trucks (not a tow strap)
  • Soft shackles or rated bow shackles
  • Recovery damper, heavy bag or blanket
  • Shovel
  • Gloves
  • Your owner’s manual (to find the recovery points)

Steps

  1. Stop and look. Figure out what’s holding you and where solid ground is. If it’s beyond your gear or skill, call a professional; that’s cheaper than an injury.
  2. Find rated recovery points. Check your owner’s manual for where your truck’s recovery points are, on both trucks. Tie-down loops, trailer hitch balls, bumpers and suspension parts are not recovery points. Hitch balls aren’t made for these loads and can snap off and fly like a bullet.
  3. Use the right strap. A recovery (snatch) strap stretches and stores energy, which eases the shock on both trucks. A tow strap or chain doesn’t stretch, so it shock-loads everything and can break something. Use a recovery strap with a minimum breaking strength of about two to three times the gross vehicle weight of the lighter truck. Never use a recovery strap for ordinary towing.
  4. Inspect it. Don’t use a strap that’s cut, frayed or damaged. A soaking-wet strap is weaker and stretches less.
  5. Connect it. Use a soft shackle or a load-rated bow shackle at each end. Soft shackles have no metal pin to turn into a projectile. If using a steel shackle, tighten the pin until it seats, then back it off about half a turn. Never join two straps with a shackle; if one breaks, the shackle becomes a missile.
  6. Line up. Put the recovery truck as straight in line with the stuck truck as possible, with the strap untwisted and a few feet of slack.
  7. Dampen it. Drape a recovery damper, heavy bag or blanket over the middle of the strap to knock it down if something lets go.
  8. Clear the area. Passengers out. Everyone stands at least 1.5 times the strap’s unstretched length away, and never in line with the strap or in the path of either truck.
  9. Agree on signals. Both drivers know who goes when, which way, and when to stop.
  10. Pull. The recovery truck eases forward to take up the slack and keeps going, letting the strap’s stretch do the work. The stuck truck drives gently at the same time. If it doesn’t come out, try again with a little more speed, not a lot. Avoid repeated hard jerks.
Safety: Recovery straps have killed people when hardware or recovery points let go. Rated points only, never a hitch ball or tie-down, never a chain for snatching, damper on, everybody well back.

Homemade Stovetop Mac and Cheese

My boys would eat mac and cheese every night if I let them. This one beats the box.

Quick answer Cook 8 ounces of elbow macaroni. In the same pot, melt 2 tablespoons butter, whisk in 2 tablespoons flour for a minute or two, then slowly whisk in 2 cups milk and simmer until it thickens. Off the heat, stir in about 2 cups shredded cheddar until smooth. Toss with the pasta, loosening with a splash of pasta water.
Homemade Stovetop Mac and Cheese
Photo: Sumeet Jain from San Francisco, USA / Wikimedia Commons, CC BY-SA 2.0
Ingredients

  • 8 ounces elbow macaroni (about 2 cups dry)
  • Salt for the pasta water
  • 2 tablespoons butter
  • 2 tablespoons all-purpose flour
  • 2 cups whole milk
  • About 2 cups (8 ounces) shredded cheddar, sharp or mild
  • 2 ounces cream cheese, in small pieces (optional, extra creamy)
  • 1/2 teaspoon salt and a pinch of black pepper
  • A little mustard powder or paprika (optional)

Directions

  1. Cook the pasta in a big pot of salted boiling water according to the package. Save about 1 cup of the cooking water, then drain.
  2. Make the base. In the same pot over medium heat, melt the butter. Whisk in the flour (and mustard powder or paprika, if using) and cook, whisking, 1 to 2 minutes.
  3. Add the milk slowly, whisking so it doesn’t lump. Add the salt and pepper. Bring to a simmer and cook, whisking often, until it thickens enough to coat a spoon.
  4. Add the cheese. Take the pot off the heat. Stir in the cheddar (and cream cheese, if using) a handful at a time until smooth.
  5. Combine. Stir in the macaroni. If it’s too thick, add pasta water a splash at a time. Taste and adjust the salt.
Safety: Let it cool a minute before serving little ones; cheese sauce holds a lot of heat.

Tips

Shred cheese from a block if you can. Pre-shredded cheese doesn’t melt as smoothly.

How to Read a Tire Sidewall (and Pick the Right Pressure)

Tires are the only thing between your truck and the road. Worth knowing what the numbers on them say.

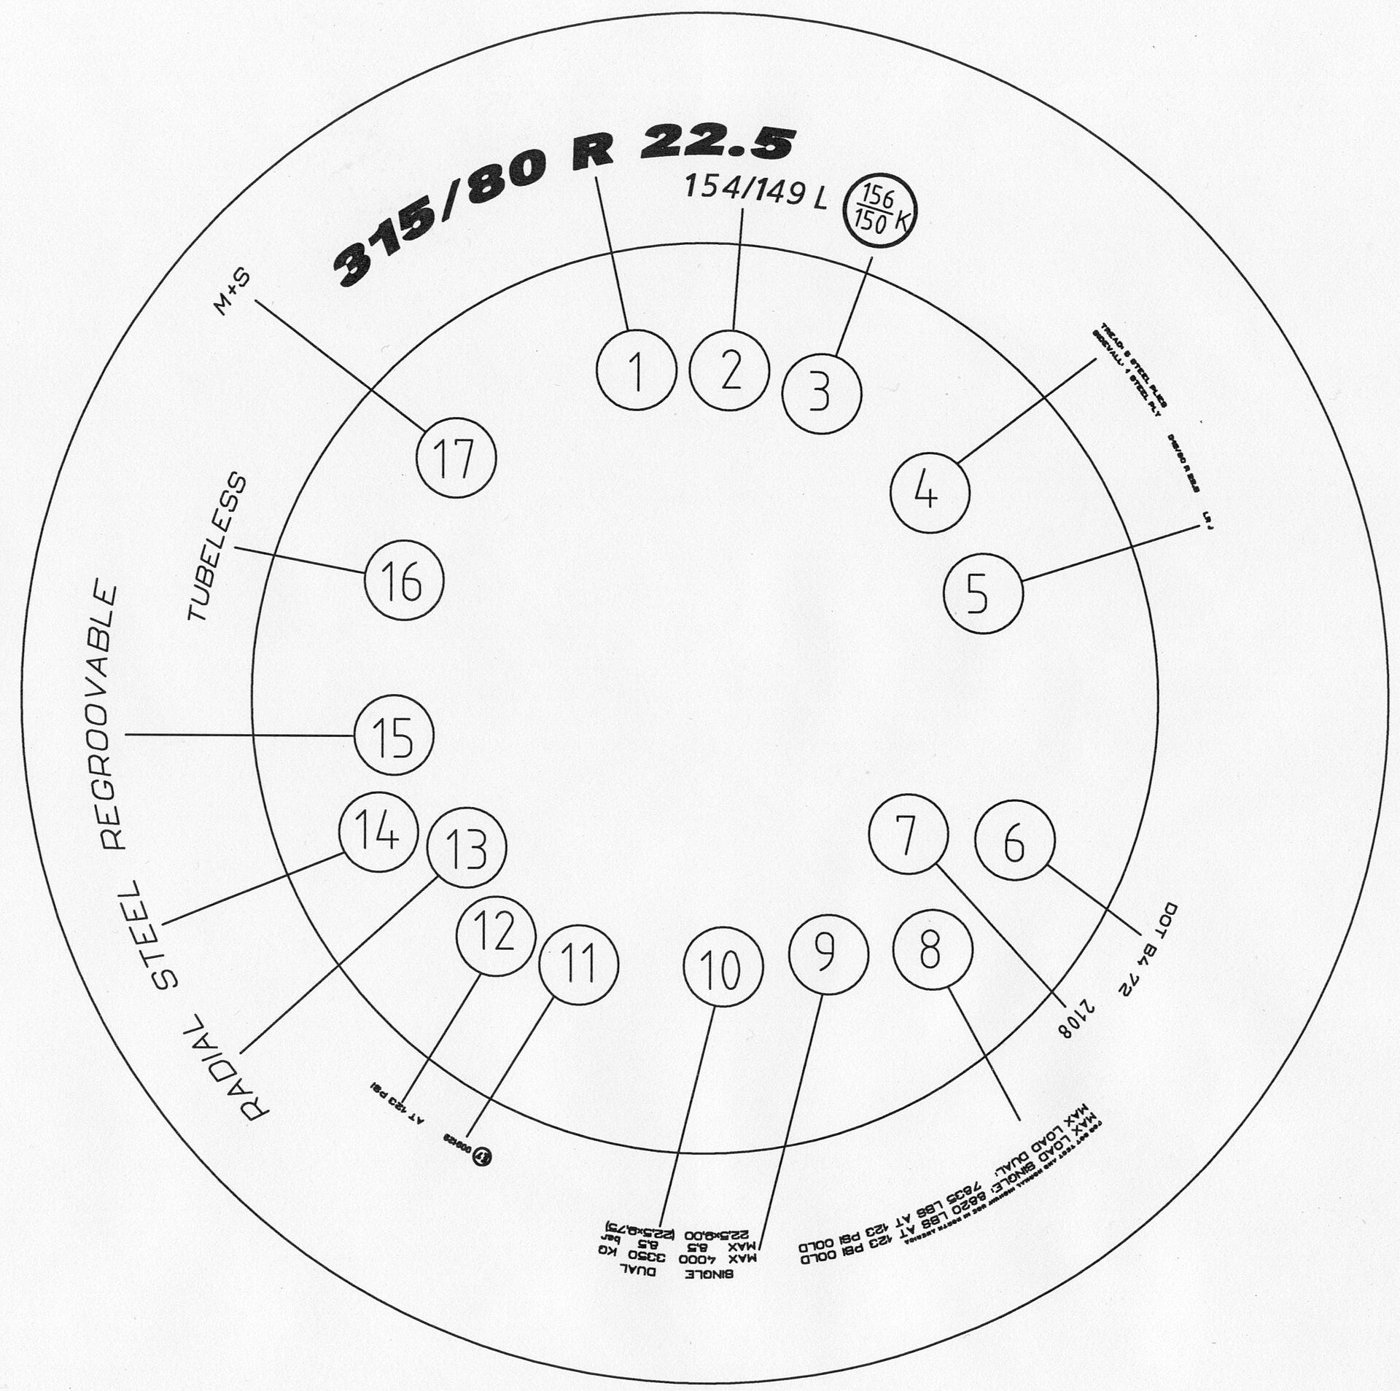
Quick answer Example: LT265/70R17 121S. LT = light truck tire (P = passenger). 265 = width in millimeters. 70 = sidewall height as a percent of the width. R = radial. 17 = wheel diameter in inches. 121 = load index. S = speed rating. For pressure, use the number on the tire placard in the driver’s door jamb or in your owner’s manual, checked cold. The number on the sidewall is the tire’s maximum, not the right pressure for your truck.
How to Read a Tire Sidewall (and Pick the Right Pressure)
Photo: Kifoc / Wikimedia Commons, Public domain
What you need

  • Tire pressure gauge
  • Your truck’s tire placard (driver’s door edge or door post) or owner’s manual

How to read it

  1. Find the size. It’s the biggest string of letters and numbers on the sidewall, like LT265/70R17.
  2. Tire type. A leading P means a passenger-car tire; LT means a light-truck tire.
  3. Width. The first number (265) is the tire’s width in millimeters.
  4. Aspect ratio. The number after the slash (70) is the sidewall’s height as a percentage of the width. Lower numbers mean a shorter sidewall.
  5. Construction. R means radial, which is what almost every modern tire is.
  6. Wheel size. The next number (17) is the wheel diameter in inches.
  7. Load index and speed rating. The code after the size (121S) is the load index (how much weight the tire can carry, from a chart) and the speed rating letter. Replacement tires should meet what your truck’s placard calls for.
  8. Age. Find the “DOT” code. Its last four digits are the week and year it was made: 2322 means the 23rd week of 2022.
  9. Right pressure. Look at the tire placard on the driver’s door edge or door post (or in the owner’s manual). That “recommended cold inflation pressure” is set by the vehicle maker for your truck. The “max press” on the sidewall is the most the tire should ever hold, not a target.
  10. Check it right. Check all tires, including the spare, at least once a month, when they’re cold: the truck hasn’t been driven for at least three hours. Add air until the gauge matches the placard.
Safety: Underinflated tires and overloaded vehicles are a major cause of tire failure. Don’t load past the weight limits on your placard.

How to Check and Top Off Your Truck’s Fluids

Five minutes under the hood now and then can save you a long walk home.

Quick answer Park on level ground with the engine off. Check oil on the dipstick (between the marks), coolant in the see-through reservoir (between MIN and MAX, engine cold), brake fluid in its reservoir (between MIN and MAX), power steering if your truck has a reservoir, and washer fluid. Top off only with the exact type your owner’s manual calls for, and never open a hot radiator cap.
How to Check and Top Off Your Truck's Fluids
Photo: Dvortygirl / Wikimedia Commons, CC BY-SA 3.0
Tools & materials

  • Owner’s manual (fluid types and locations)
  • Clean rags or paper towels
  • Funnel
  • The correct oil, coolant, brake fluid and washer fluid for your truck
  • Safety glasses and gloves

Steps

  1. Set up. Park on level ground, engine off, parking brake on. Open the manual to the maintenance section; it shows where each fill point is and what fluid goes in it.
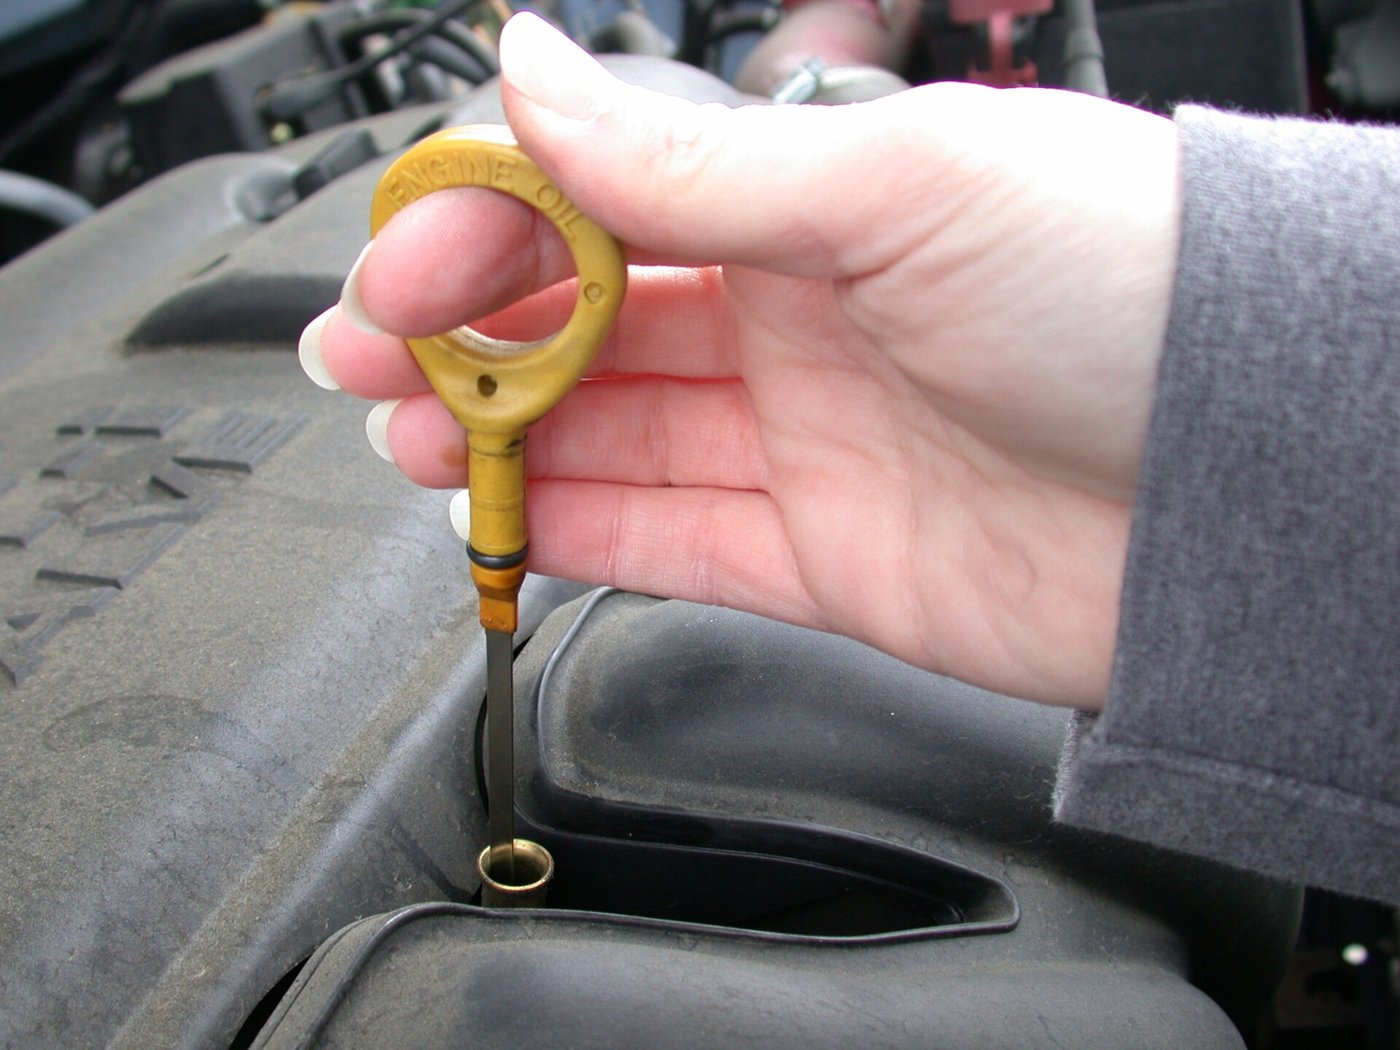
  2. Engine oil. Follow your manual on timing (some say check after the engine has sat for a while; some say warm it up, shut it off and wait a few minutes). Pull the dipstick, wipe it, push it all the way back in, pull it again and read it. The level should be between the low and full marks. If it’s at or near the low mark, add a little of the same type of oil through the filler cap, wait, and recheck. Don’t overfill.
  3. Coolant. Only with the engine cold. Look at the see-through overflow reservoir: the level should be between MIN and MAX. If it’s low, add the coolant type your manual specifies (usually a 50/50 mix of antifreeze and water) to the reservoir. If you’re adding coolant regularly, have it checked for a leak.
  4. Brake fluid. Wipe the reservoir cap clean before opening so dirt can’t fall in. Level should be between MIN and MAX. Add only the DOT type listed in the manual or on the cap, and don’t mix types. Fresh fluid is clear to amber; dark brown or black means it’s time to have it replaced.
  5. Power steering (if your truck has hydraulic power steering). Engine off. Check the reservoir’s markings or the dipstick on its cap, and top off with the fluid your manual specifies.
  6. Washer fluid. Fill the reservoir to the fill line with washer fluid, not plain water.
  7. Transmission and other fluids. Procedures vary a lot between trucks. Follow your owner’s manual or have a shop check them.
  8. Put every cap back on tight and close the hood until it latches.
Safety: Never remove a radiator or coolant reservoir pressure cap when the engine is hot; it can spray scalding coolant. Coolant is poisonous: wipe up spills and keep it away from kids and pets.

Cast-Iron Skillet Cornbread

Cornbread belongs in a cast-iron skillet. That crispy edge is the best part.

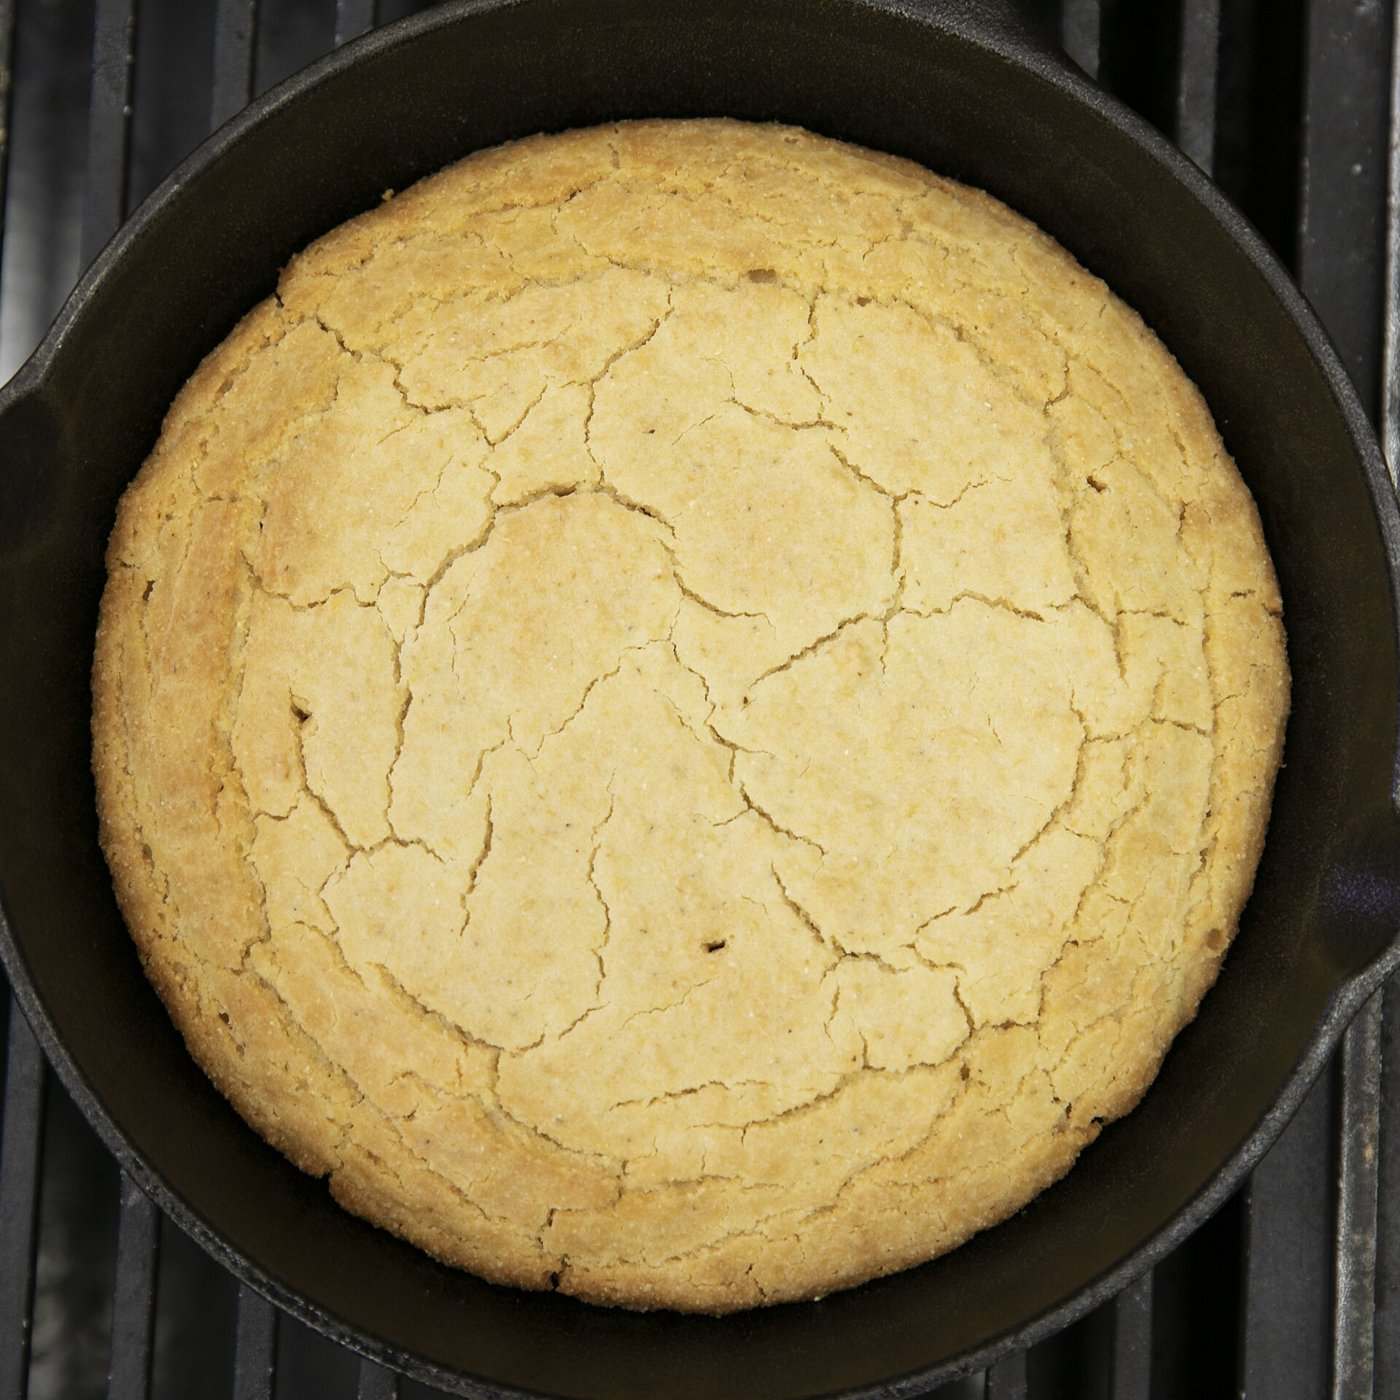
Quick answer Heat a 10-inch cast-iron skillet in a 450°F oven. Mix 2 cups cornmeal with baking powder, baking soda and salt. Whisk 1 1/2 cups buttermilk with 2 eggs. Melt butter or bacon drippings in the hot skillet, stir most of it into the batter, pour the batter in, and bake 20 to 25 minutes until golden and a toothpick comes out clean.
Cast-Iron Skillet Cornbread
Photo: Alabama Extension / Wikimedia Commons, CC0
Ingredients

  • 2 cups fine yellow or white cornmeal
  • 1 1/2 teaspoons baking powder
  • 1/2 teaspoon baking soda
  • 1 teaspoon salt
  • 1 tablespoon sugar (optional)
  • 1 1/2 cups buttermilk
  • 2 large eggs
  • 4 tablespoons butter or bacon drippings
  • A 10-inch cast-iron skillet

Directions

  1. Heat the skillet. Put the empty skillet in the oven and preheat to 450°F.
  2. Mix the dry ingredients: cornmeal, baking powder, baking soda, salt and sugar if using.
  3. Mix the wet. In another bowl whisk the buttermilk and eggs. Stir in the dry ingredients just until combined. Don’t overmix.
  4. Melt the fat. Put the butter or drippings in the hot skillet in the oven for a minute until melted. Pull the skillet out carefully and swirl to coat the bottom and sides.
  5. Combine and pour. Pour most of the hot fat into the batter, stir quickly, and pour the batter into the skillet. It should sizzle.
  6. Bake 20 to 25 minutes, until the edges are golden-brown and a toothpick in the center comes out clean.
  7. Serve warm, turned out crust-side up, with butter, honey, or a bowl of beans.
Safety: That skillet comes out of a 450°F oven. Use a thick, dry oven mitt every time you touch it, and warn the kids.

Crock-Pot Chicken and Dumplings

Chicken and dumplings on a cold night is hard to beat.

Quick answer Put a thawed whole chicken in a 6-quart slow cooker with water or broth and cook on LOW about 4 to 8 hours, until the thickest part of the thigh hits 165°F. Lift it out, pull the meat off (toss the skin and bones), and stir it back into the broth. Cut a can of refrigerated biscuits into pieces, drop them in, and cook on HIGH about 60 to 90 minutes, until no longer doughy in the middle.
Crock-Pot Chicken and Dumplings
Photo: Amadscientist / Wikimedia Commons, CC BY-SA 3.0
Ingredients

  • 1 whole chicken, 4 to 5 pounds, fully thawed, giblets removed (not rotisserie or precooked)
  • Chicken broth or water (see step 2)
  • 1 teaspoon salt and 1/2 teaspoon black pepper, plus more to taste
  • 1 can (8-count) refrigerated biscuits
  • 2 tablespoons butter (optional)
  • Optional vegetables: 1 onion, chopped; 1 to 2 ribs celery, sliced; 2 carrots, sliced
  • A 6-quart slow cooker and a food thermometer

Directions

  1. Start clean and cold. Wash your hands and the cooker. Keep the chicken in the fridge until you’re ready, and make sure it’s completely thawed. Never start a frozen chicken in a slow cooker.
  2. Load the cooker. If you’re using vegetables, put them in the bottom first (they cook slower than the meat). Set the chicken on top, breast side up, sprinkle with the salt and pepper, and add broth or water so the chicken is sitting well down in liquid but the lid still closes easily. Don’t fill past your cooker’s fill line.
  3. Cook. Cover and cook on LOW about 4 to 8 hours, depending on the size of the bird and your cooker. If you can, run it on HIGH for the first hour, then switch to LOW. Keep the lid on; lift it only to check doneness.
  4. Check the temperature. The chicken is done when a food thermometer in the thickest part of the thigh, not touching bone, reads at least 165°F. Check the breast too. The meat should be falling off the bone.
  5. Pull the meat. Lift the chicken onto a big platter or cutting board (it will want to fall apart). Let it cool enough to handle, then pull or slice the meat off. Throw away the skin and bones. Fish out any small bones that stayed in the broth.
  6. Return the meat. Stir the chicken back into the broth, add the butter if using, and taste for salt and pepper. Turn the cooker to HIGH.
  7. Make the dumplings. Open the biscuits, press each one a little flatter, and cut each into quarters or strips.
  8. Cook the dumplings. Drop the pieces in over the top and spoon some broth over them. Cover and cook on HIGH about 60 to 90 minutes, stirring gently once or twice, until a piece from the middle is cooked through and not doughy.
  9. Serve hot, with extra black pepper.
Safety: Cook poultry to at least 165°F, measured with a food thermometer. If the power goes out while you’re away, throw the food out even if it looks done. Refrigerate leftovers in shallow covered containers within 2 hours, and reheat them on the stove or in the microwave to 165°F, not in the slow cooker.

Good to know

Slow cookers vary, so use the times as a guide and the thermometer as the final word. A 6-quart cooker is a good fit for a 4- to 5-pound chicken.

Backyard Chickens: The Basics

Keeping chickens is a lot of fun, and fresh eggs every morning sure don’t hurt.

Quick answer Check your local rules first (many towns ban roosters). Give hens a secure coop with at least 3 square feet each plus a run, or 8 to 10 square feet each if they’re kept inside. Provide one nest box per four hens, roost space, clean water daily, and a complete layer feed (about 16% protein) once they’re about 18 weeks old. Wash your hands after every visit.
Backyard Chickens: The Basics
Photo: Josh Larios from Seattle, US / Wikimedia Commons, CC BY-SA 2.0
Tools & materials

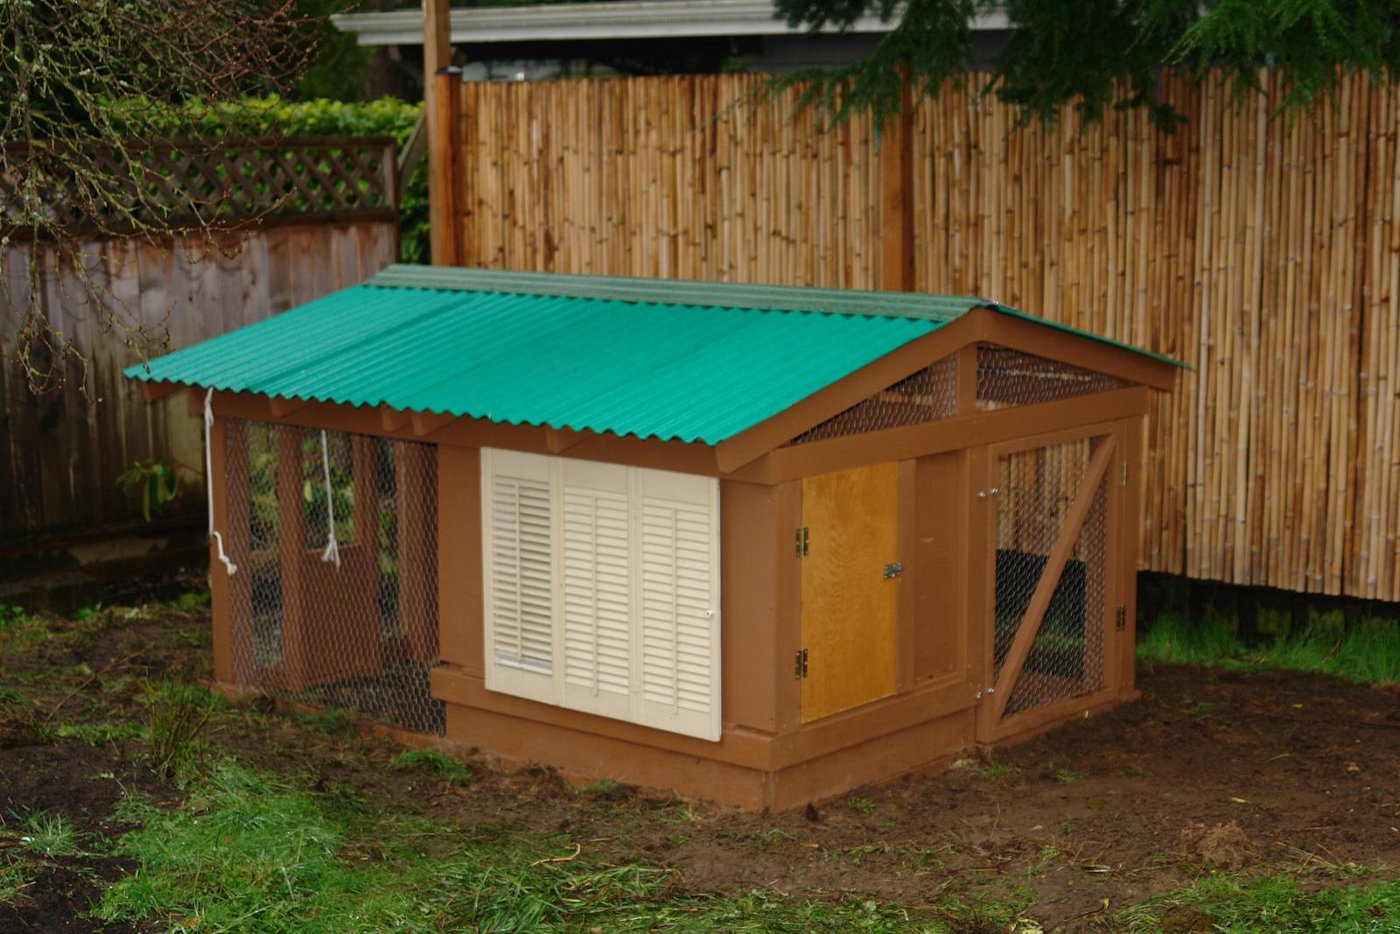
  • Predator-proof coop and run
  • Roost bars and nest boxes
  • Feeder and waterer
  • Starter, grower, then layer feed
  • Oyster shell and grit
  • Pine shavings for bedding
  • Dedicated coop shoes and work gloves

Steps

  1. Check the rules. Look up your city or county ordinances on chickens and roosters before you buy.
  2. Buy healthy birds. Get chicks from a hatchery in the USDA National Poultry Improvement Plan (NPIP). Pick birds that are bright, alert and active.
  3. Give them room. At least 3 square feet per bird inside the coop if they have a run, or 8 to 10 square feet per bird with no outdoor access.
  4. Roosts and nests. Give each bird about 6 to 8 inches of roost bar. Add one nest box (about 12 by 12 inches) for every four hens, off the floor and away from the roosts.
  5. Feed by age. Chicks get a starter feed (about 18 to 20% protein) for the first 6 to 8 weeks, then a grower feed. Laying hens over about 18 weeks get a complete layer feed of about 16% protein, with oyster shell and grit offered separately.
  6. Water every day. Clean the waterer and give fresh water daily. Going without water can stop egg production.
  7. Keep it clean and dry. Keep 3 to 4 inches of shavings on the floor, and remove wet litter.
  8. Collect eggs at least once a day, twice if you can. Throw out cracked eggs. Brush or rub dirt off with a dry cloth rather than washing warm eggs in cold water, and refrigerate them. Cook eggs until the white and yolk are firm.
  9. Quarantine newcomers. Keep new birds apart from your flock for at least 30 days.
  10. Watch for sickness. Call a poultry vet or your county extension office if birds eat or drink less, have runny droppings, sneeze or struggle to breathe, lay fewer or odd eggs, or die suddenly.
Safety: Chickens can carry Salmonella even when they look healthy. Wash hands with soap and water after touching birds, eggs, feed or anything in the coop. Keep coop shoes outside, keep birds out of the house, don’t kiss or snuggle them, and don’t let children under 5 handle chicks or chickens.

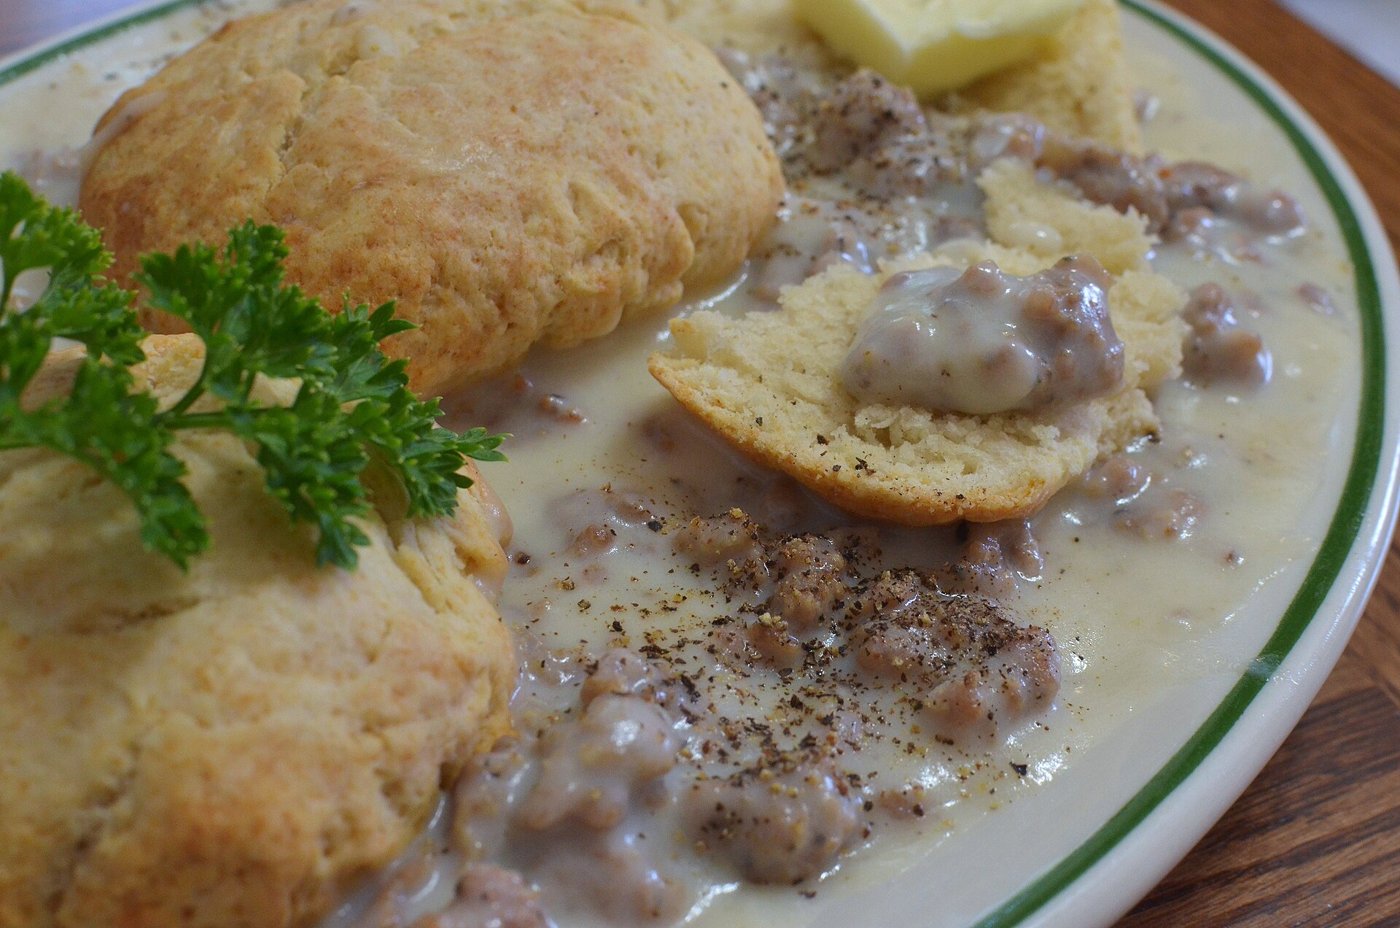
Biscuits and Sausage Gravy

Biscuits and gravy is about as close to perfect as breakfast gets.

Quick answer Biscuits: 2 cups flour, baking powder, a little soda and salt, cold butter worked in, 3/4 cup buttermilk; pat, fold, cut, and bake at 450°F about 15 minutes. Gravy: brown 1 pound of bulk sausage, stir 1/4 cup flour into the drippings, whisk in 2 cups of milk, simmer until thick, and pepper it generously. Makes about 8 biscuits; serves 4.
Biscuits and Sausage Gravy
Photo: jeffreyw / Wikimedia Commons, CC BY 2.0
Ingredients

  • Biscuits: 2 cups all-purpose flour (spooned and leveled), plus more for dusting
  • 2 teaspoons baking powder
  • 1/4 teaspoon baking soda
  • 1 teaspoon salt
  • 1 teaspoon sugar (optional)
  • 6 to 7 tablespoons cold unsalted butter, sliced
  • 3/4 cup cold buttermilk, plus a little for brushing
  • Gravy: 1 pound bulk pork breakfast sausage
  • 1/4 cup all-purpose flour
  • 2 cups whole milk
  • Salt and plenty of black pepper

Directions

  1. Heat the oven to 450°F and line a baking sheet with parchment.
  2. Mix the dry ingredients for the biscuits in a bowl. Work in the cold butter with your fingertips until there are still pea-size pieces. Those make the flaky layers.
  3. Add the buttermilk and stir just until a shaggy dough forms. Don’t overwork it.
  4. Pat and fold. On a floured board, pat the dough into a rectangle, fold it in thirds like a letter, and pat it out about 3/4 inch thick.
  5. Cut rounds with a 2 1/2-inch cutter and set them on the pan, close together for soft sides or an inch apart for crisp ones. Press the scraps together and cut more. Brush the tops with buttermilk.
  6. Bake about 15 minutes, until lightly browned.
  7. Meanwhile, brown the sausage in a 10- to 12-inch skillet over medium heat, breaking it up, until no pink remains (160°F).
  8. Make the roux. Leave about 2 tablespoons of fat in the pan with the sausage (pour off extra). Sprinkle in the flour and stir it around about 3 minutes.
  9. Add milk a little at a time, whisking, and scrape up the browned bits. Bring to a simmer and cook a few minutes until thick. Thin with a splash more milk if needed.
  10. Season with salt and lots of black pepper. Split the biscuits and spoon the gravy over.
Safety: Cook pork sausage to 160°F. Keep little hands back from the hot skillet and grease.

Tips

Measure flour by spooning it into the cup and leveling it; scooping packs it in and makes dry biscuits. Lightly browned is the goal, not dark.

How to Set a Fence Post in Concrete

A fence is only as good as its posts. Set them right and you won’t be fixing a leaning line in a few years.

Quick answer Call 811 first. Dig a hole about three times the post’s width (12 inches for a 4-inch post) and about 1/3 of the post’s total length deep, plus 6 inches for gravel. Tamp in 6 inches of gravel, brace the post plumb, fill with fast-setting concrete to 3 to 4 inches below grade, add about a gallon of water per 50-pound bag, and wait 4 hours before loading it.
How to Set a Fence Post in Concrete
Photo: U.S. Department of Defense Current Photos Petty Officer 2nd Class Ryan Batchelder/Commander, U.S. 3rd Fleet / Wikimedia Commons, Public domain
Tools & materials

  • Rot-resistant post (pressure-treated wood or galvanized steel)
  • Post-hole digger or auger, shovel
  • Gravel or crushed stone
  • Fast-setting concrete mix (50-lb bags)
  • Level, two 2×4 braces, stakes, screws and a drill
  • Bucket for water
  • Eye protection, gloves and a dust mask

Steps

  1. Call 811 (in Arkansas, Arkansas 811) before you dig. Utilities have two full working days to mark their lines. Know where your property line is, too.
  2. Dig the hole about three times as wide as the post, and about 1/3 of the post’s total length deep, plus 6 inches. Example: for a 6-foot fence, an 8-foot post goes about 32 inches in the ground, so dig about 38 inches. Use a tube form in loose or sandy soil.
  3. Add gravel. Pour about 6 inches of gravel or crushed stone in the bottom and tamp it level. It drains water away from the post’s end.
  4. Set and brace the post. Stand it in the hole, screw braces to two adjacent sides, and stake the other ends of the braces.
  5. Plumb it. Check two adjacent sides with a level, adjust, and fasten the braces to the stakes.
  6. Add concrete. Pour dry fast-setting mix around the post to 3 to 4 inches below the ground. For holes deeper than 2 1/2 feet, fill and water in layers of no more than 2 1/2 feet.
  7. Add water. Pour about 1 gallon of water per 50-pound bag and let it soak in. Recheck plumb right away.
  8. Let it set. It sets in roughly 20 to 40 minutes. Wait about 4 hours before hanging rails or putting heavy loads on it, and longer when it’s cooler than 72°F.
  9. Finish. Backfill the top with soil or sod, sloped away from the post so water runs off.
Safety: Wear eye protection, nitrile gloves and a dust mask when working with dry concrete mix. Hand-dig near any marked utility lines.
« Older posts Newer posts »