Welcome to djgaston.com

Month: October 2026 (Page 3 of 4)

How to Build a Simple Chicken Nesting Box

Hens are happier, and eggs stay cleaner, with a decent nesting box. It’s an easy afternoon build.

Quick answer Build an open-front box about 12 inches wide, 12 inches tall and 12 inches deep, with a board about 4 inches high across the bottom of the front to hold in bedding and eggs. Plan on one box for about every four hens. Mount it 18 to 24 inches off the floor, with a perch bar or ramp in front and a sloped top so hens don’t roost on it.
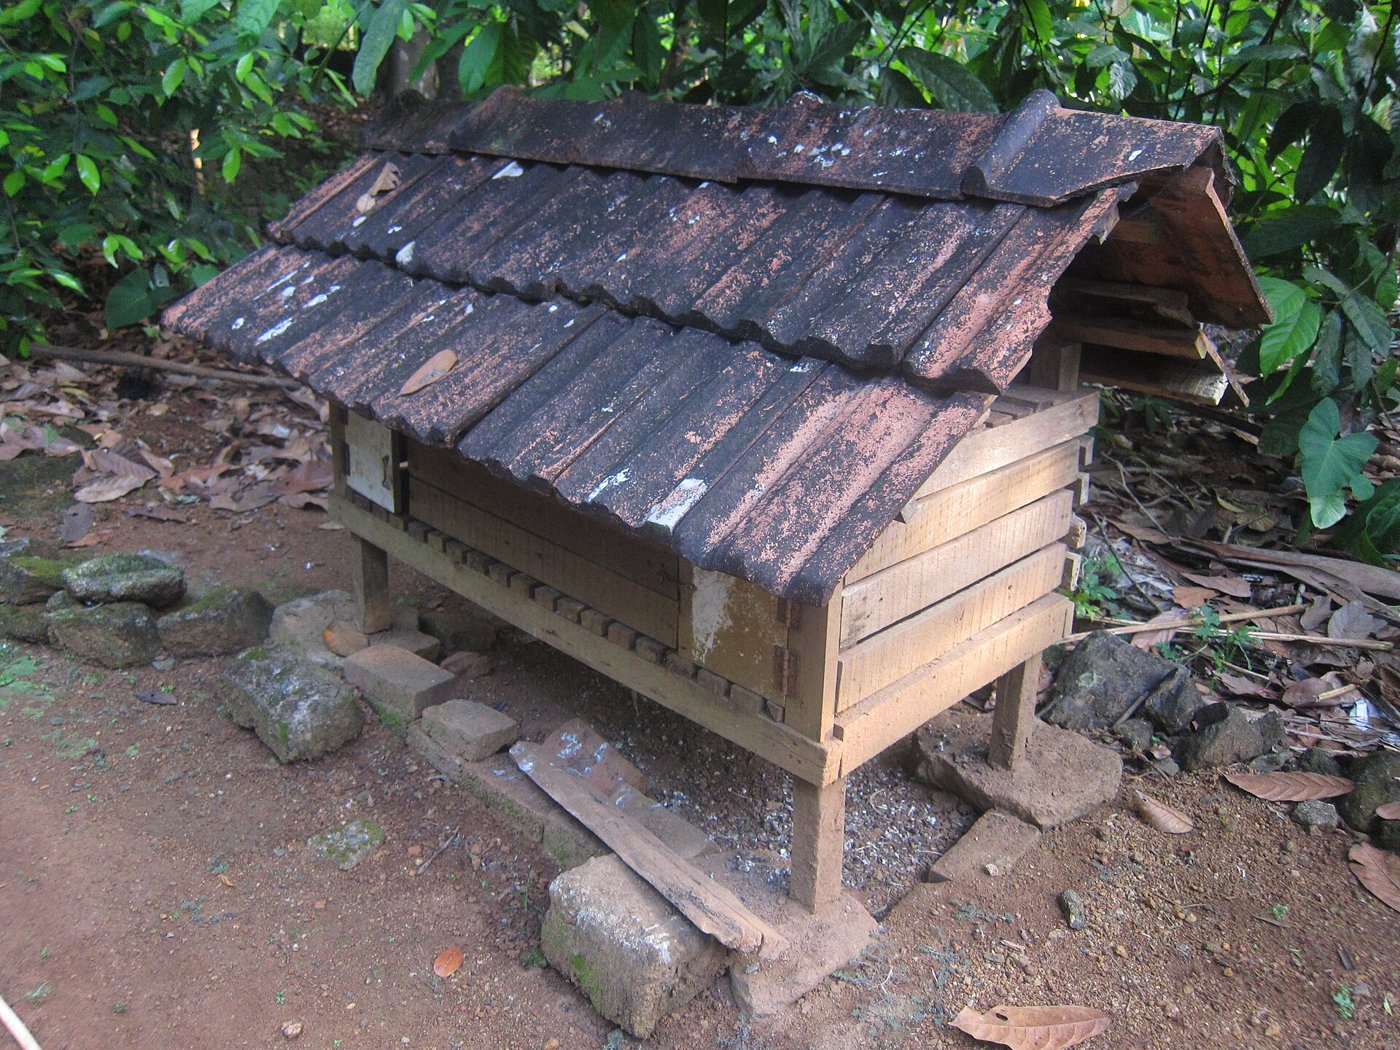
How to Build a Simple Chicken Nesting Box
Photo: Shijan Kaakkara / Wikimedia Commons, CC BY-SA 4.0
Tools & materials

  • Scrap plywood or boards
  • Exterior screws
  • Saw, drill, tape measure, square
  • A 1×2 or similar for a landing perch
  • Pine shavings or straw for bedding

Steps

  1. Count your hens. Plan one box for every four or so.
  2. Cut the parts for a box about 12 inches on each side inside: a bottom, a back, two sides and a top. For a row of boxes, use one long bottom, back and top with dividers every 12 inches.
  3. Cut the front lip about 4 inches tall and the full width of the box. It keeps bedding and eggs from rolling out.
  4. Assemble the sides to the bottom and back with screws, then add the lip across the front.
  5. Slope the top. Fit the top at a steep slope (about 45 degrees) so hens can’t roost on it and dirty it.
  6. Mount it to the coop wall 18 to 24 inches off the floor, away from the roosts. Add a perch bar in front or a ramp so hens can hop up.
  7. Add bedding, a few inches of clean, dry shavings or straw, and keep it clean and dry.
Safety: Sand or trim sharp edges and screw tips inside the box. Wear eye protection when cutting.

Good to know

Collect eggs often, twice a day if you can. Eggs left sitting get dirty or broken and can encourage broody hens and egg eating.


How to Find Your Property Lines

Before you put up a fence or clear a fencerow, it pays to know where your line actually is.

Quick answer Pull your deed and any survey or plat, then look at your county’s parcel (GIS) map to get oriented. Online maps are approximate, not legal boundaries. Walk the corners looking for iron pins or other monuments. For a fence, a building or a disagreement with a neighbor, hire a licensed land surveyor.
How to Find Your Property Lines
Photo: Bureau of Land Management Derivative Work by TBP25 (Cropped) / Wikimedia Commons, Public domain
Tools & materials

  • Your deed and any prior survey or plat
  • Phone or computer for the county assessor’s parcel map
  • Measuring tape and flags or stakes
  • Metal detector (optional, for buried pins)

Steps

  1. Gather your paperwork. Your deed has the legal description. Your closing papers may include a survey. Recorded plats are kept by the county, and the Arkansas Division of Land Surveys has a public plat search.
  2. Look at the county parcel map. Most county assessors have an online parcel or GIS viewer that draws parcel lines over aerial photos. Use it to get oriented. The lines can be off by several feet or more, so don’t build to them.
  3. Compare. Check that the lengths and shape on the parcel map match the distances on your survey or plat.
  4. Call 811 before you probe or dig. In Arkansas, call 811 or start a ticket online. Utilities have two full working days to mark their lines. 811 marks buried utility lines only, not property lines.
  5. Find the corners. Starting from a known point on your survey, measure along the lines toward each corner. Look for iron pins, rebar or pipe. A metal detector helps with buried ones. Flag what you find.
  6. Hire a surveyor when it matters. For a fence, building, sale or dispute, a licensed Arkansas land surveyor can locate or reset the corners and stake the lines. The Division of Land Surveys lists county surveyors, and your title company can suggest names.
Safety: Don’t pull up, move or reset a survey pin you find, even if it’s in the way. Hand-dig anywhere near marked utility lines.

How to Read a Property Survey or Plat

Whether it’s a house lot or a few acres, it’s worth knowing exactly what you own. The survey tells you, once you can read it.

Quick answer Start with the title block, north arrow, scale and legend. Each boundary line is labeled with a bearing (its direction, like N 35°10’35” E) and a distance in feet. Corners are marked by monuments, usually iron pins, noted as found or set. Dashed or hatched areas are often easements. The legal description ties it all to a lot and block or to a section, township and range.
How to Read a Property Survey or Plat
Photo: Surveyor General of Louisiana / Wikimedia Commons, Public domain
What you need

  • A copy of your survey or recorded plat (from your closing papers, the county, or the Arkansas Division of Land Surveys plat search)
  • A ruler or engineer’s scale
  • A highlighter

How to read it

  1. Know which document you have. A plat is the recorded map of how a subdivision or piece of land was divided into lots, streets and easements. A survey of your parcel, done by a licensed surveyor, shows your boundaries and usually the buildings and other improvements on the ground when it was done.
  2. Read the title block. It names the property, owner or client, surveyor, date and the surveyor’s seal. Note the date: an old survey may not show newer fences or buildings.
  3. Orient it. Find the north arrow and the scale (for example, 1 inch = 50 feet). Then check the legend for what each symbol and line type means.
  4. Find the boundary. The heavy solid line is usually the outer boundary of the parcel. Trace it with a highlighter.
  5. Read the bearings. A bearing like N 35°10’35” E means: face north, then turn 35 degrees, 10 minutes, 35 seconds toward east. That’s the direction of that line.
  6. Read the distances. Lengths are in feet, often to the hundredth (125.50′ is 125 and a half feet). Curved lines are labeled with curve data like radius and arc length.
  7. Find the corners. Symbols at the corners show the monuments, such as iron pins, rebar, pipes, concrete or stone. “Found” means it was already there; “set” means the surveyor placed it.
  8. Spot easements and setbacks. Utility, drainage and access easements are often drawn as dashed or hatched strips with their width. Building setback lines show how close you can build to the line.
  9. Read the legal description. In a subdivision it’s usually lot and block. Rural Arkansas land is usually described by section, township and range, often with a metes-and-bounds description that walks the boundary line by line.
Safety: A survey or plat on paper tells you where the line is supposed to be. Before you build a fence or a building close to a line, have a licensed surveyor stake it on the ground.

How to Back Up an iPhone

A phone at the bottom of a creek is a lot less painful when everything’s backed up.

Quick answer Easiest: Settings > [your name] > iCloud > iCloud Backup, turn on Back Up This iPhone, then tap Back Up Now. After that it backs up on its own when the phone is locked, charging and on Wi-Fi. Or plug it into a Mac (Finder) or Windows PC (Apple Devices app) and back up there. You can do both.
How to Back Up an iPhone
Photo: Ka Kit Pang / Wikimedia Commons, CC BY-SA 4.0
Tools & materials

  • Wi-Fi and enough iCloud storage, or
  • A Mac or Windows PC and a charging cable

Steps

  1. iCloud: connect to Wi-Fi. Open Settings, tap your name, then iCloud, then iCloud Backup.
  2. Turn on Back Up This iPhone, then tap Back Up Now and stay on Wi-Fi until it finishes. If it says there isn’t enough space, you’ll need to free up iCloud storage or buy more.
  3. From now on, iCloud backs up automatically when the phone is locked, plugged in and on Wi-Fi. Check the “last successful backup” time on that same screen now and then.
  4. Mac: plug the iPhone in, open Finder, and select the iPhone in the sidebar. Tap Trust on the phone if asked.
  5. Under General, choose Back up all of the data on your iPhone to this Mac. Check Encrypt local backup if you want your Health, Activity and saved passwords (Keychain) included, and write down the password. Click Back Up Now.
  6. Windows: install and open the Apple Devices app, plug in the iPhone, select it, and go to General. Choose to back up all of the data to this computer, optionally encrypt it, and click Back Up Now.
Safety: Don’t lose your encrypted backup password. Without it, that backup can’t be restored.

Good to know

  • iCloud backups are always encrypted. Computer backups are only encrypted if you turn it on.
  • If you use iCloud Photos or Messages in iCloud, those already sync to iCloud and aren’t part of the backup itself.
  • Computer backups don’t include things already in iCloud, Face ID or Touch ID settings, Apple Pay, or Apple Mail data.
  • If you turn off iCloud Backup, Apple keeps your last backup for 180 days before deleting it.

How to Spot a Phishing Text or Email

I get these fake “your package is delayed” texts all the time. Here’s how to know one when you see it.

Quick answer Be suspicious of any message you weren’t expecting that wants you to click a link, open an attachment, pay something or “confirm” personal information. Don’t click. If you think it might be real, contact the company using a phone number or website you already know is genuine. Report phishing texts by forwarding them to 7726 (SPAM), phishing emails to reportphishing@apwg.org, and either one to ReportFraud.ftc.gov.
How to Spot a Phishing Text or Email
Photo: Chris Lappas / Wikimedia Commons, CC BY-SA 4.0

How to spot it and what to do

  1. Ask: was I expecting this? And do I even have an account with this company? If not, it’s very likely a scam.
  2. Look for the usual stories. “Suspicious activity on your account.” “Problem with your payment.” An invoice you don’t recognize. A package that can’t be delivered. A government refund. Free prizes or gift cards. A low-interest card or student loan help.
  3. Look for pressure. Scams want you to act now, before you think it over.
  4. Look at the greeting and the ask. Generic greetings are a warning sign. Real companies won’t text or email you a link to update your payment information or ask for account details by text.
  5. Don’t click, don’t reply. Links can lead to a fake login page that steals your password, or install harmful software. Attachments can too.
  6. Check it the safe way. Go to the company’s real website or app by typing it yourself, or call a number from your statement or the back of your card. Not the number in the message.
  7. Report it, then delete it. Forward texts to 7726 (SPAM), use “Report Junk” in your messaging app, forward emails to reportphishing@apwg.org, and report to ReportFraud.ftc.gov.
Safety: Clicked or typed something in? If you gave out a Social Security, credit card or bank number, go to IdentityTheft.gov for the exact steps. Change the password on that account and anywhere you reused it. If you opened an attachment, update your security software and run a scan.

Protect yourself ahead of time

  • Turn on automatic updates for your phone and computer.
  • Turn on multi-factor authentication (a code or key on top of your password) for email and banking.
  • Back up your phone and computer, so a bad click can’t take everything with it.

Venomous Snakes of Arkansas and the Ozarks: How to Tell, What to Do

With boys running around outside, knowing which snakes to leave alone is just part of living in Arkansas.

Quick answer Arkansas has six venomous snakes: copperhead, cottonmouth, timber rattlesnake, western pigmy rattlesnake, western diamondback rattlesnake and the rare Texas coral snake. Give every snake room and don’t handle it. If someone is bitten, call 911 or get to a hospital fast. No cutting, sucking, tourniquets or ice.
Venomous Snakes of Arkansas and the Ozarks: How to Tell, What to Do
Photo: Selbymay / Wikimedia Commons, CC BY-SA 3.0
What helps

  • Boots and long pants in brush and tall grass
  • Leather gloves for moving brush, rocks or wood piles
  • A flashlight at night
  • A phone for a photo (from a safe distance) and to call for help

Know them, avoid them, and what to do after a bite

  1. Copperhead (statewide). Tan to coppery with darker brown hourglass bands. From the side, the half-hourglass looks like a Hershey’s Kiss. Adults are about 1.5 to 3 feet. Young ones have a bright yellow tail tip. Great camouflage in leaf litter, so watch where you step and reach.
  2. Cottonmouth, or water moccasin (statewide, near water). Thick-bodied, dark brown to nearly black as an adult, with a dark stripe through the eye. When bothered it may gape and show the white inside of its mouth. Young ones are boldly banded with a yellowish-green tail.
  3. Timber rattlesnake (statewide). Gray, yellowish or light brown with dark, jagged crossbands, often a rust-colored stripe down the back, and a solid dark “velvet” tail ending in a rattle.
  4. Western pigmy rattlesnake (statewide). Small and gray with black blotches and a rust-colored stripe down the back. The rattle is tiny and can be hard to hear.
  5. Western diamondback (west-central Arkansas). Brown and tan diamond-shaped blotches and a black-and-white banded “coon tail” before the rattle. Found on rocky, open hillsides.
  6. Texas coral snake (rare, southwest Arkansas). Red, yellow and black bands that go all the way around, with red touching yellow and a black snout. Some harmless snakes, like milk snakes, have red, black and yellow bands too, so look but don’t touch.
  7. Don’t rely on eye shape. Coral snakes have round pupils. And if you’re close enough to see a snake’s pupils, you’re too close.
  8. Avoid bites. Snakes are most active at dawn and dusk and in warm weather. Stay out of tall grass and leaf piles when you can, and don’t reach into wood piles or under rocks with bare hands. Rattlesnakes can strike a third or more of their body length, and they don’t always rattle first.
  9. If someone is bitten: get away from the snake, keep calm and call 911 or have someone drive you to a hospital. Don’t drive yourself. Take off rings and watches before swelling starts. Keep the bitten limb in a comfortable, neutral position. Wash the bite with soap and water and cover it with a clean, dry dressing. Mark the edge of the swelling on the skin and write the time next to it.
Safety: Do NOT cut the bite, suck out venom, use a tourniquet, ice it, soak it, or give alcohol or pain relievers like aspirin or ibuprofen. Don’t try to catch or kill the snake, and never handle a dead one or a severed head. Snap a photo from a safe distance if you can.

Good to know

Most snakes you’ll meet in Arkansas are harmless: only six of the state’s native species are venomous. Leave them be and they’ll usually leave you be.

How to Start (and Put Out) a Campfire Safely

A good campfire is half the reason to go camping. Doing it right means the woods are still there next time.

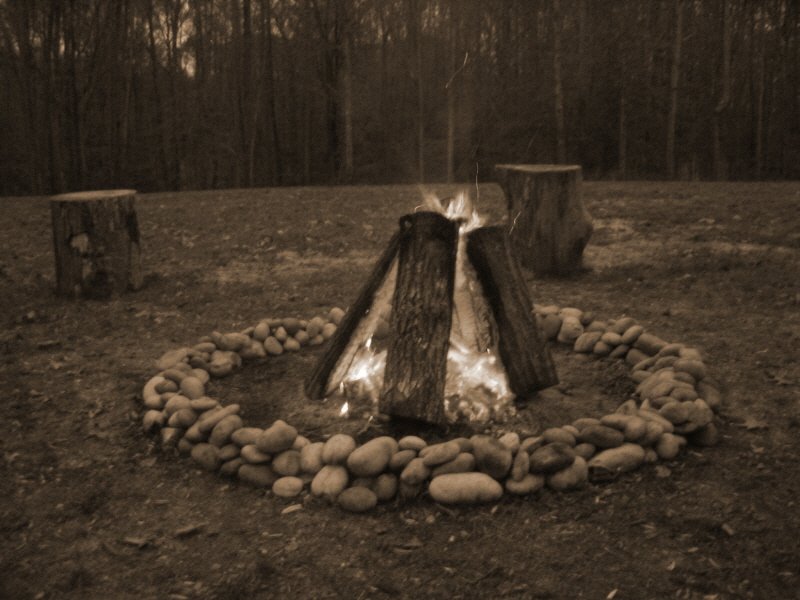
Quick answer Check fire restrictions first. Use an existing fire ring if there is one, at least 15 feet from tents and brush, with a 10-foot cleared circle. Light dry tinder, add kindling, then logs. Keep it small. To put it out: drown, stir, drown again, and feel. If it’s too hot to touch, it’s too hot to leave.
How to Start (and Put Out) a Campfire Safely
Photo: Jancarrow (uploader) / Wikimedia Commons, Public domain
Tools & materials

  • Bucket of water and a shovel (have them ready before you light)
  • Tinder: dry leaves, grass, pine needles, small twigs
  • Kindling: sticks smaller than about 1 inch around
  • Firewood: larger dry pieces
  • Matches or a lighter
  • A phone, in case you need to call 911

Steps

  1. Check the rules. Search “fire restrictions” plus your county or park, or call the campground. Don’t build a fire where it’s banned, or when it’s dry or windy.
  2. Pick the spot. Use an existing fire ring or rock circle if there is one. Otherwise choose a flat, open spot out of the wind, at least 15 feet from tents, brush and low branches, with open sky overhead (at least three times the height of the flames).
  3. Prep the pit. Clear a circle at least 10 feet across down to bare ground. With no ring, dig a pit about a foot deep and circle it with rocks.
  4. Gather wood. Pick up dead, dry sticks and wood off the ground. Don’t cut live trees or branches; green wood won’t burn anyway.
  5. Build it. Pile tinder in the center. For cooking, lean kindling over it like a teepee or a lean-to. For a longer-lasting fire, stack kindling around it log-cabin style or crisscross it on top.
  6. Light it. Light the tinder with a match or lighter. Never use gasoline or other flammable liquids. Blow gently at the base, then add kindling and larger pieces a little at a time.
  7. Tend it. Keep it small. Somebody watches it the whole time, and kids and dogs stay back. Don’t burn trash, cans, glass, batteries or aerosol cans.
  8. Put it out: drown. Pour lots of water on it until the hissing stops. Don’t just cover it with dirt or sand.
  9. Stir. Stir the ashes and embers with the shovel, and scrape partly burned sticks and logs.
  10. Drown again, then feel. Add more water and keep stirring until everything is cool. Hold the back of your hand close over the ashes. If you feel any heat, keep going.
Safety: If the fire gets out of the pit or embers land in the grass, call 911 right away. Never leave a fire unattended, not even for a few minutes.

Good to know

Abandoned or poorly put-out campfires are a major cause of wildfires. Pack out everything you brought in and leave the site as good as you found it, or better.

How to Get Rid of Fruit Flies

Fruit flies are annoying, but once you find where they’re coming from they’re easy to beat.

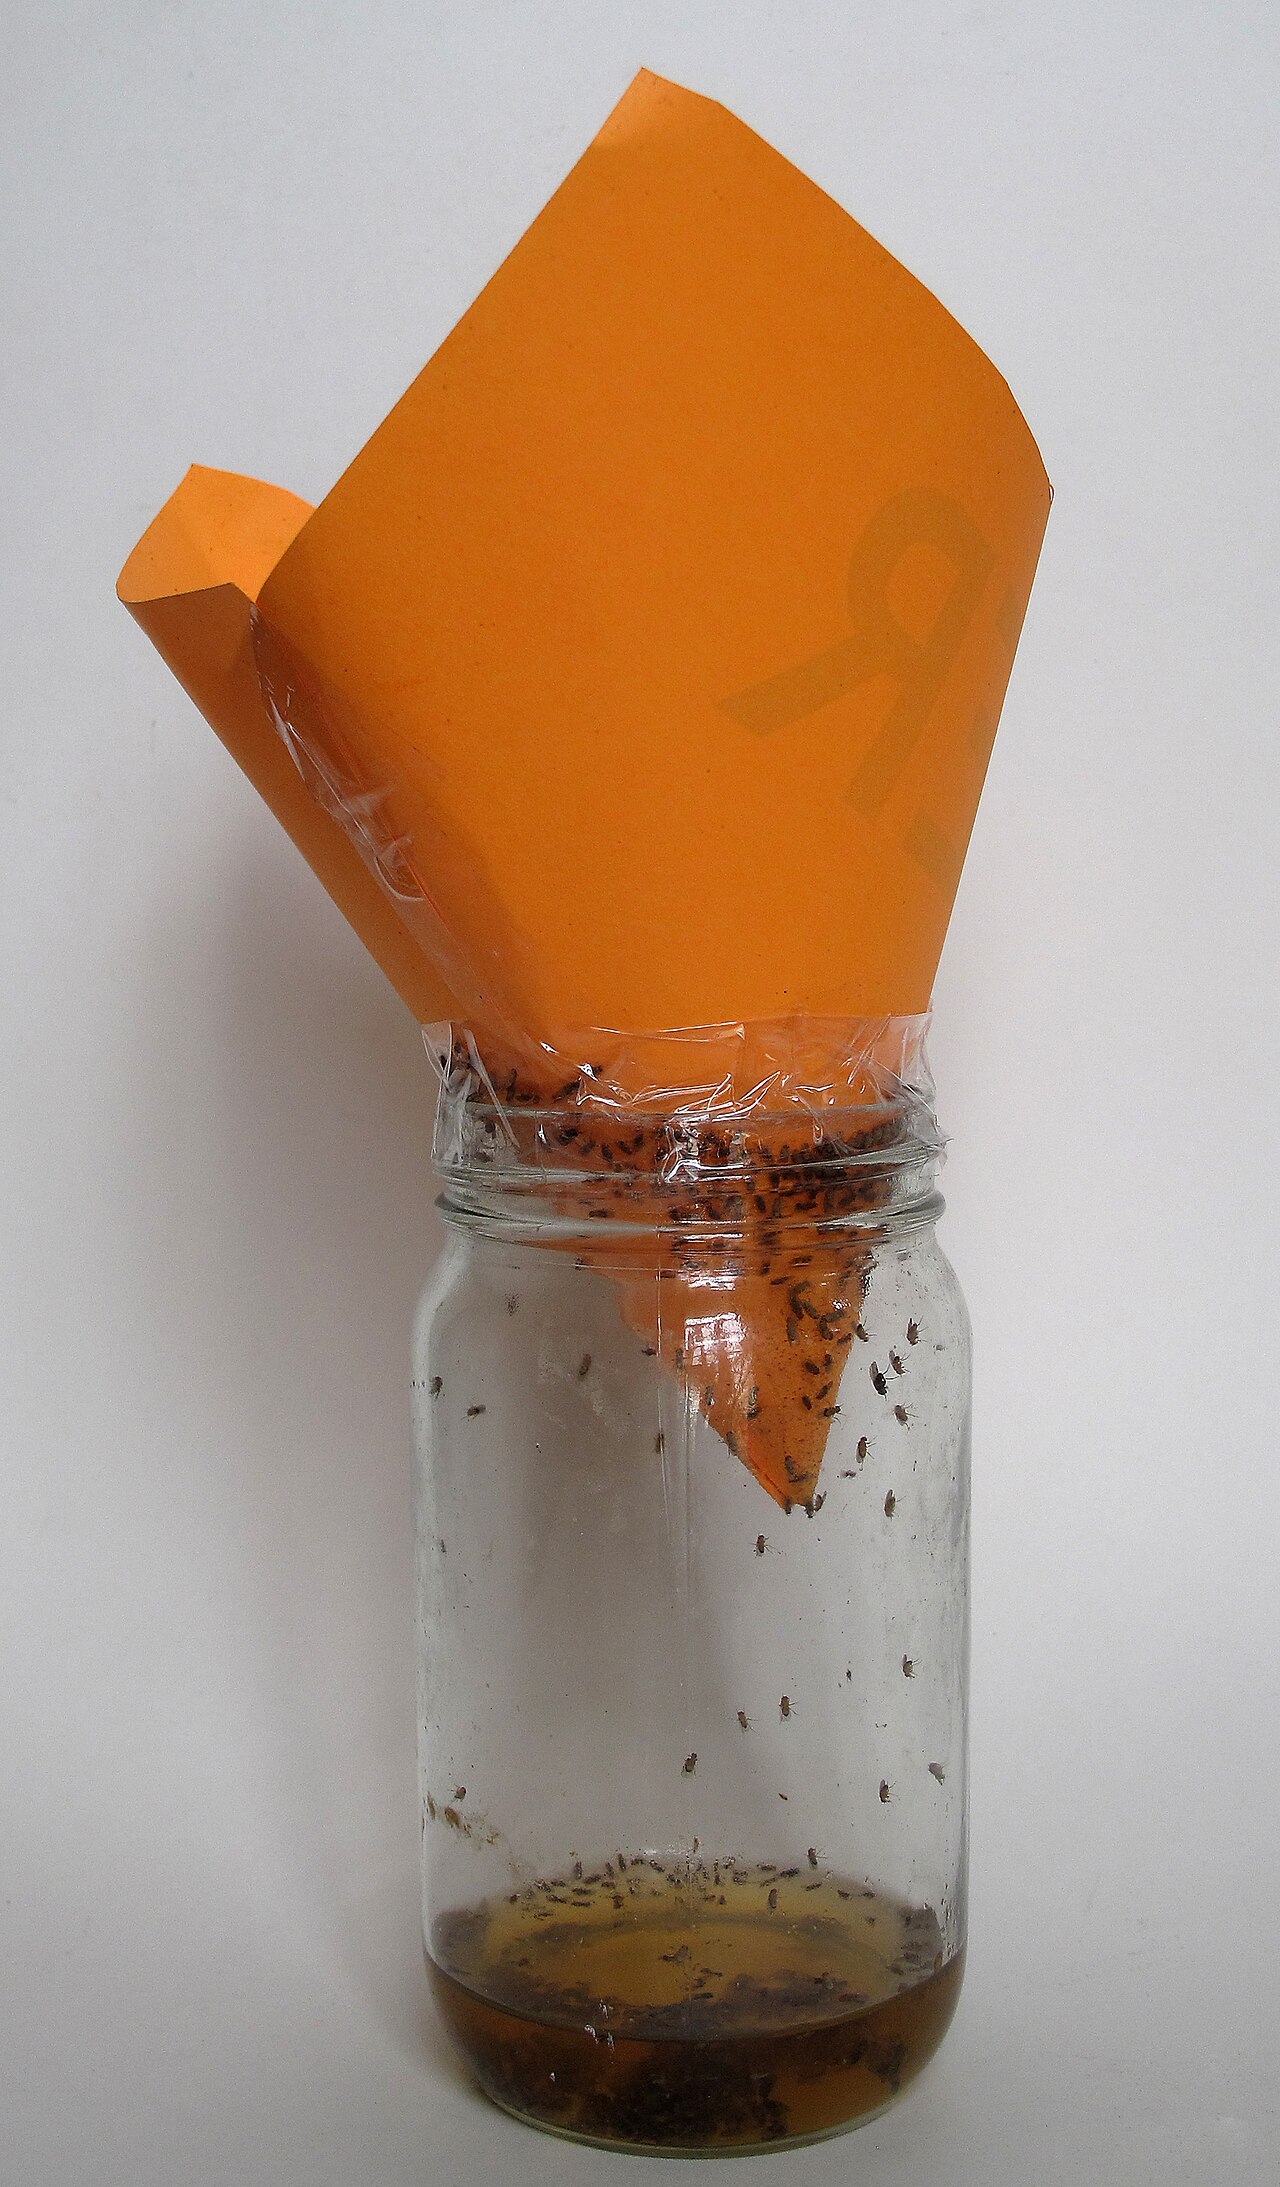
Quick answer Find and remove where they breed: overripe produce, the trash and recycling bins, sticky spills, damp mops and rags, and gunky drains. Then catch the leftover adults with a cider-vinegar trap: a little vinegar, a drop of dish soap, and plastic wrap with small holes poked in it.
How to Get Rid of Fruit Flies
Photo: Downtowngal / Wikimedia Commons, CC BY-SA 3.0
Tools & materials

  • Apple cider vinegar
  • Dish soap
  • Small jar or glass, plastic wrap, rubber band
  • Stiff drain brush
  • Clear plastic bag or wrap (to test drains)

Steps

  1. Refrigerate ripe fruit, or toss anything overripe or damaged. Check potatoes and onions for a soft one.
  2. Empty and rinse the trash, compost and recycling (bottles and cans especially). Wipe up spills under appliances.
  3. Wash or replace damp mops, sponges and rags.
  4. Test the drains: tape clear plastic over each drain overnight. Flies stuck underneath in the morning mean that drain is a breeding spot.
  5. Scrub the inside of that drain with a stiff brush, then flush with hot water to clear the film they breed in.
  6. Trap the adults: pour about 1/2 inch of cider vinegar in a jar with a drop of dish soap. Cover with plastic wrap, poke a few small holes, and set it where they gather. Empty and refresh it every few days.
  7. Keep at it for a week or two. The point is to break their breeding cycle.

Bug spray won’t solve this. As long as the breeding spot is there, new flies keep hatching.

My Dog Ate Chocolate: What to Do Now

If your dog just got into chocolate, take a breath. Here’s exactly what to do, in order.

Quick answer Call your veterinarian or the ASPCA Animal Poison Control Center at (888) 426-4435 now (a consultation fee may apply). Have these ready: your dog’s weight, the kind of chocolate, about how much was eaten, and when. Darker chocolate is more dangerous. Don’t make your dog vomit unless a vet tells you to.
My Dog Ate Chocolate: What to Do Now
Photo: Rob Hanson / Wikimedia Commons, CC BY 2.0
Tools & materials

  • The wrapper or packaging
  • Your dog’s approximate weight
  • Your vet’s number, or the nearest emergency vet

Steps

  1. Get your dog away from any chocolate that’s left.
  2. Figure out what kind it was. Baking chocolate, cocoa powder and dark chocolate are the most dangerous. Milk chocolate is less so, and white chocolate has very little of the toxic stuff, though it’s still fatty.
  3. Estimate how much is missing and note the time.
  4. Call your vet or ASPCA Animal Poison Control at (888) 426-4435 and follow their instructions.
  5. Watch for vomiting, diarrhea, restlessness, panting, heavy thirst or peeing, racing heart, tremors or seizures. Signs often show up within several hours and can last a day or more.
  6. If there are tremors, seizures, collapse or trouble breathing, go to an emergency vet now.
My Dog Ate Chocolate: What to Do Now
Photo: Mx. Granger / Wikimedia Commons, CC0
Safety: Don’t give home remedies, and don’t make your dog vomit unless a vet tells you to. Chocolate contains theobromine and caffeine, which dogs process slowly. Small dogs and dark chocolate are the riskiest mix. Cats are affected too.

This is general information, not veterinary advice. When in doubt, call.

How to Restore and Season Cast Iron

I love cast iron. A rusty skillet isn’t ruined; it’s just waiting for a little attention.

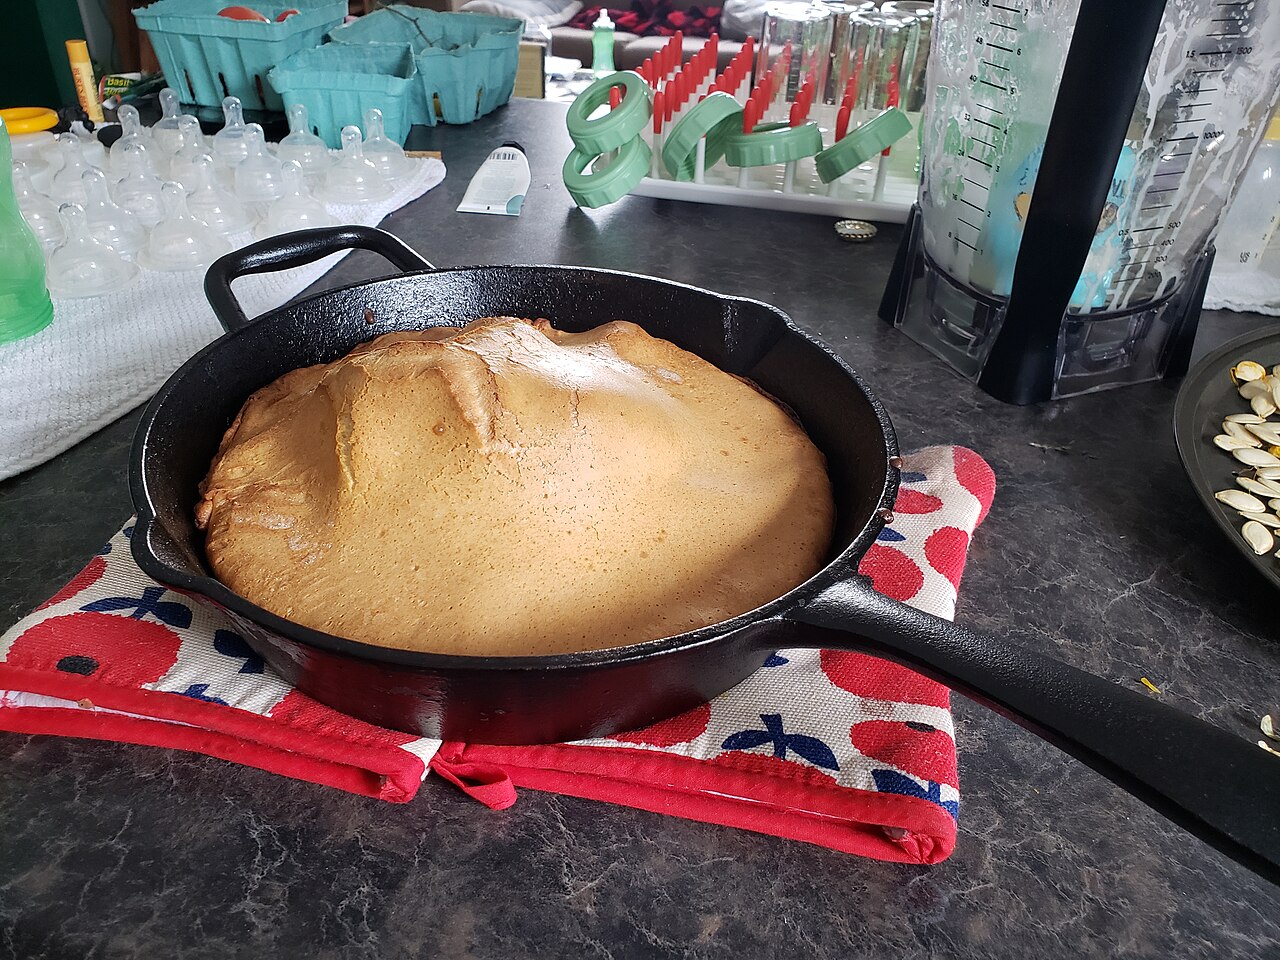
Quick answer Scrub off the rust with steel wool, wash and dry it completely, then wipe on a very thin coat of cooking oil. Bake it upside down at 450–500°F for one hour, then let it cool in the oven. Repeat if it still looks dull.
How to Restore and Season Cast Iron
Photo: Douglas P Perkins (Douglaspperkins (talk)) / Wikimedia Commons, CC BY 3.0
Tools & materials

  • Steel wool or a rust eraser
  • Dish soap, warm water, stiff brush
  • Vegetable oil, shortening or another high-smoke-point oil
  • Lint-free cloth or paper towels
  • Aluminum foil

Steps

  1. Scour all the rust off, inside and out, down to bare gray iron.
  2. Wash with warm soapy water and scrub. (Soap is fine on cast iron.)
  3. Dry it right away with a towel, then set it on a warm burner for a few minutes to drive off every bit of moisture.
  4. Rub a small amount of oil over every surface, including the handle and bottom. Then wipe it off as if you made a mistake. It should look barely shiny, not wet. Too much oil turns sticky.
  5. Put foil on the lower rack to catch drips. Set the pan upside down on the upper rack.
  6. Bake at 450–500°F for 1 hour. Turn off the oven and let the pan cool inside.
  7. Repeat 2–3 times for a fresh restoration. Then cook something fatty (bacon, cornbread) to build it up.
How to Restore and Season Cast Iron
Photo: Taylorderek / Wikimedia Commons, CC BY-SA 4.0
Safety: Seasoning at high heat can smoke. Run the vent fan and open a window.

Everyday care

Wash, dry right away, wipe on a whisper of oil while it’s warm, and store dry. Don’t soak it or put it in the dishwasher.

« Older posts Newer posts »