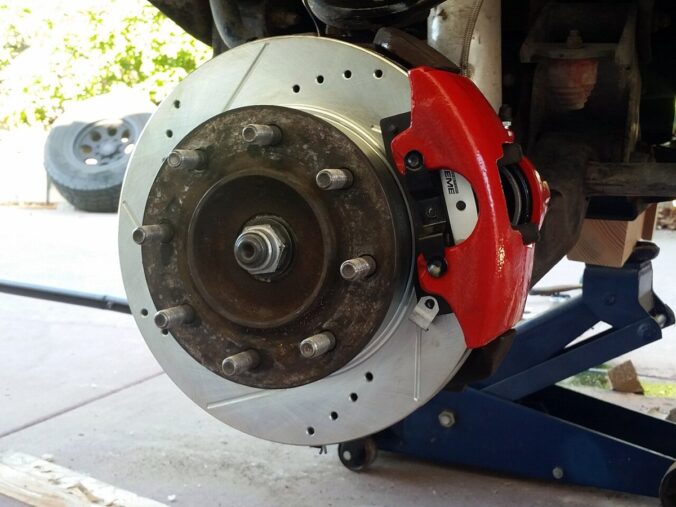
The first brake job I ever did, the new pads squeaked, and I’d heard brake grease helps with noise. So I put it right on the pad friction surface, the part that grabs the rotor. Then I went to stop and nearly crashed into my pole barn. That’s the whole reason this guide exists: brake grease is real, and it does help with noise, but it goes on the back of the pads and the parts they slide on. Never on the side that touches the rotor. Here’s how to do a front pad job right the first time.
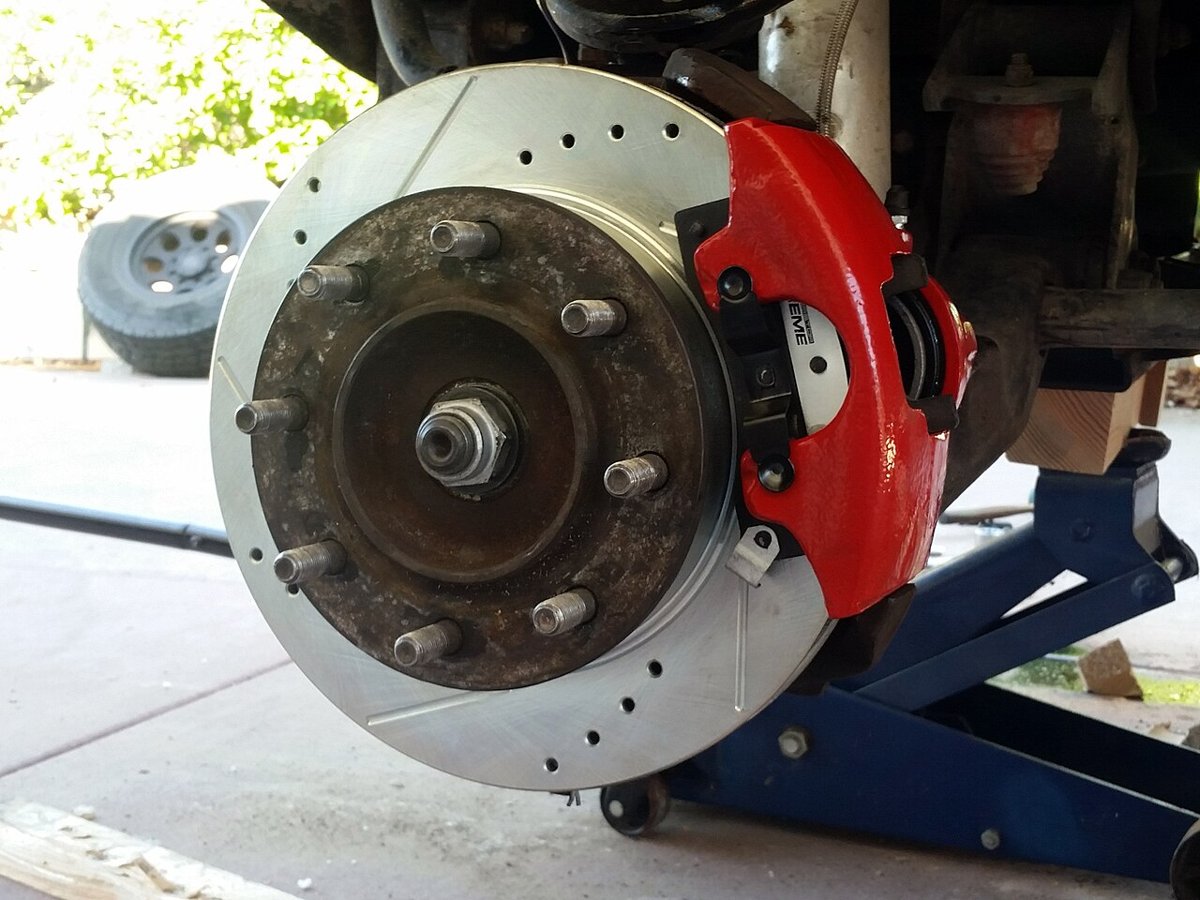

Brakes are the one system where a mistake can hurt someone else, not just you. If anything below doesn’t match what you see on your vehicle, stop and look up the factory procedure or have a shop finish it. There’s no shame in that.
Signs it’s time for pads
- A high-pitched squeal when you brake that goes away when you let off. Many pads have a small metal wear indicator tab that’s designed to squeal against the rotor when the pad gets thin. It’s a warning, not a failure, so don’t ignore it.
- Grinding or growling. That usually means the friction material is gone and metal is hitting metal. Now you’re eating the rotor too. Stop driving it if you can.
- Thin pads you can see. Through many wheels you can see the outer pad against the rotor. If the friction material looks about as thin as the metal backing plate, it’s time.
- A brake warning light on vehicles with electronic pad wear sensors.
- Pulsing in the pedal or steering wheel, pulling to one side, or a soft, low pedal. These can point to rotor, caliper or hydraulic problems, not just pads. Check them out before you assume pads will fix it.
- New pads for your exact year, make, model and axle (front and rear pads are different), plus new pad hardware/abutment clips if they’re included or available
- High-temperature brake lubricant (a silicone-based brake grease or a synthetic caliper grease made for brakes, not general-purpose chassis grease)
- A lug wrench or breaker bar and socket, and a torque wrench
- A floor jack, a pair of rated jack stands and wheel chocks
- Sockets or wrenches for the caliper bolts and caliper bracket bolts
- A C-clamp or a caliper piston tool (some rear calipers need a wind-back tool instead)
- A wire brush or small file to clean rust off the bracket
- A bungee cord or a piece of wire to hang the caliper
- A spray bottle of water with a little dish soap, shop rags, gloves and safety glasses
- A clean turkey baster or syringe you’ll use only for brake fluid, and the brake fluid type printed on your reservoir cap
Step 1: Get the specs and check for surprises
Before you buy anything, look up three things in the service manual, a repair guide (many public libraries have free access) or the pad manufacturer’s instructions: the caliper bolt and bracket bolt torque, the lug nut torque, and the rotor minimum thickness (it’s usually stamped on the rotor itself, often marked “MIN TH”).
Two things to check first on newer vehicles:
- Electronic parking brake. If your vehicle has a parking brake button instead of a lever or pedal, the rear calipers often have to be put into a service mode with a scan tool or a menu procedure before you can push the pistons back. Forcing them can damage the caliper. Front pads usually aren’t affected, but look it up.
- Screw-in rear pistons. Some rear calipers with an integrated parking brake need the piston turned back in with a wind-back tool, not pushed with a clamp.
Step 2: Lift it and get the wheel off
Park on flat, hard ground (not gravel or grass if you can help it), set the parking brake if you’re working on the front, and chock the wheels on the end you’re not lifting. Break the lug nuts loose while the tire is still on the ground. Then jack the vehicle at the lift point shown in the owner’s manual and set it down on a rated jack stand under a solid frame or axle point. Give it a shove before you put your hands near anything. Never work with a wheel off while the vehicle is held up only by the jack. If you’re new to lifting a vehicle, my flat tire guide walks through the jack and lug nut basics.
Pull the wheel and set it flat under the side of the vehicle as one more safety backup.
Step 3: Keep the brake dust down
Brake dust is nasty stuff, and pads and linings on older vehicles can contain asbestos. You usually can’t tell what’s in old pads by looking. The EPA’s advice for home mechanics is simple:
- Don’t blow brakes off with compressed air, and don’t dry-brush or dry-wipe them. That puts the dust in the air you’re breathing.
- Wet it first. Mist the brake parts with water (a little dish soap helps) from a spray bottle, then wipe them down with a damp rag.
- Don’t use a regular shop vac without a HEPA filter, and don’t hose the brakes off with a garden hose.
- Keep kids, food and drinks away from the work area, change clothes before you go in the house, and wash your work clothes separately.
An N95 mask is cheap extra protection. Wear safety glasses too, because rust and grit love to fall straight into your eyes.
Step 4: Remove the caliper and old pads
Most cars and trucks have a floating (sliding) caliper: one or two pistons on the inboard side, and the whole caliper slides on two pins to squeeze the outer pad. On most of them you only need to remove the two smaller caliper bolts (sometimes called guide pin bolts) to swing or slide the caliper off. Leave the bigger bracket bolts alone unless you’re replacing the rotor.
Once the caliper is off, hang it from the coil spring or suspension with a bungee or wire. Don’t let it dangle by the rubber brake hose, and don’t kink or twist the hose. Then pull the old pads out of the bracket and note how they came out: which one had the wear indicator, which way the clips and shims faced. Snap a picture with your phone before you take anything else apart. Do one side at a time so you always have the other side to look at.
Look at the old pads. If one is worn much more than the other, or worn at an angle, the caliper may be sticking or a slide pin may be seized. That’s worth fixing now.
Step 5: Check the rotor
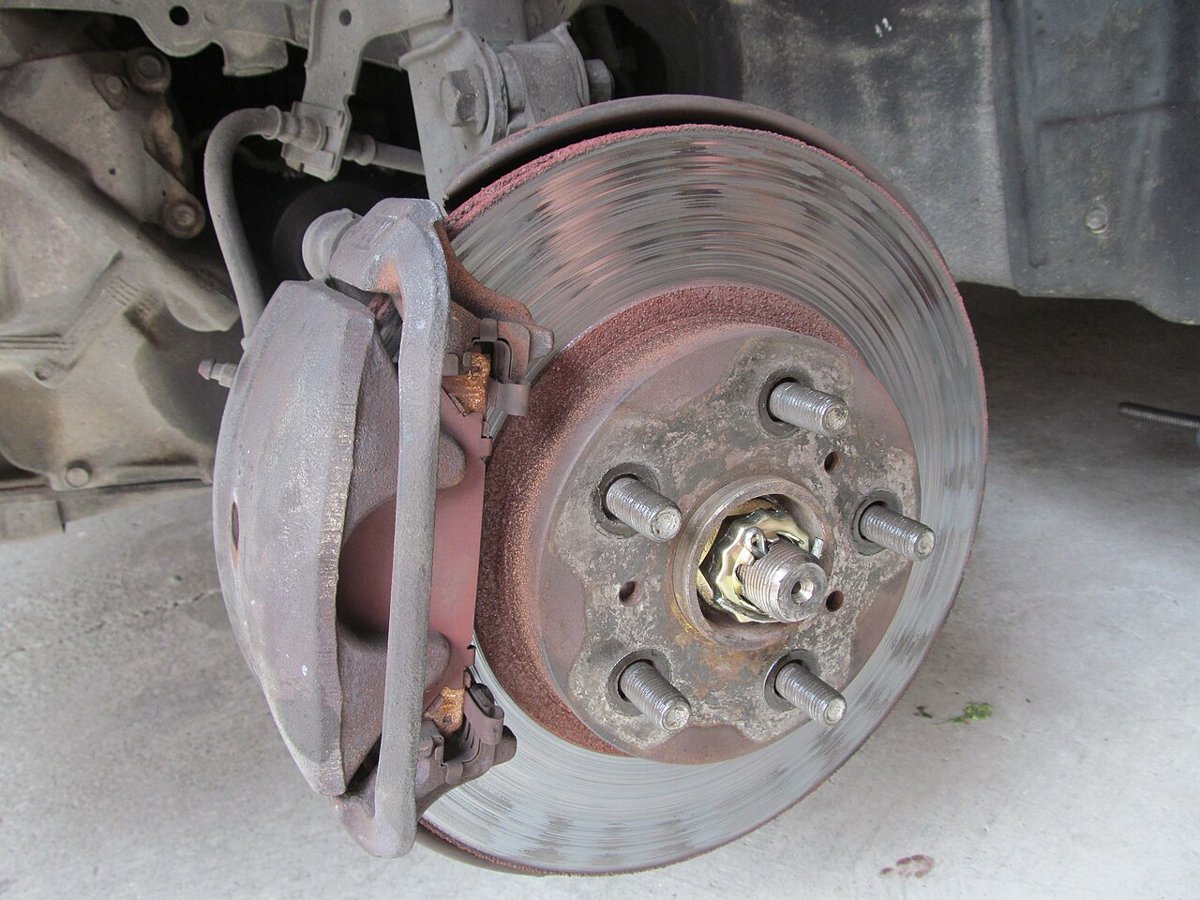

Run a fingernail across the rotor face. Light, even wear is normal. Replace or resurface the rotor if you see any of these:
- Deep grooves your fingernail catches on, or a big lip at the outer edge
- Thickness below the minimum stamped on it (measure with a caliper or micrometer)
- Cracks, or blue or dark hot spots
- A pulsing pedal before the job, which can mean uneven thickness
If you put new pads on rotors that are badly worn, the pads won’t seat well and you’ll be doing it again soon. New rotors usually come with a protective coating, so clean them with brake cleaner before you install them.
Step 6: Clean the bracket and the slide pins
Pull out the old abutment clips (the thin metal clips where the pad ears ride). Clean the bracket where the clips sit with a wire brush or small file so the new clips sit flat and the pads can slide freely. Rust buildup here is a common reason new pads stick and wear unevenly.
Pull the slide pins out of their rubber boots, wipe off the old grease, and check that the boots aren’t torn. A pin that’s seized or rusty, or a torn boot, should be replaced. A caliper that can’t slide makes the inner pad do all the work.
Step 7: Push the piston back in (watch the fluid)
The new pads are thicker than the old ones, so the caliper piston has to go back into its bore to make room. As your pads wore down, the piston crept out and the reservoir level dropped. Pushing it back sends that fluid back up to the reservoir, which can overflow if someone topped it off.
- Pop the hood and take the cap off the brake fluid reservoir. If the level is near the MAX line, pull a little out with your clean baster or syringe into a throwaway container.
- Put an old pad across the face of the piston and use a C-clamp or piston tool to push it back slowly and evenly. Keep an eye on the reservoir as you go.
- If the piston won’t move with steady pressure, stop. Don’t force it. It may be seized, which means the caliper needs to be rebuilt or replaced.
- Put the cap back on when you’re done so moisture stays out. Brake fluid absorbs water from the air, which lowers its boiling point.
Brake fluid eats paint. If any drips on the fender or body, blot it and rinse it with water right away.
Step 8: Grease the right spots (this is where I went wrong)
Brake lubricant does two jobs: it lets parts slide so the pads apply and release evenly, and a thin layer between the pad backing and the caliper helps damp the vibration that causes squeal. It’s meant for metal contact points and slides only. Use a grease made for brakes. Regular petroleum grease can swell the rubber boots and seals.
Put a thin film on:
- The caliper slide pins (then slide them back into their boots)
- The abutment clips where the pad ears ride
- The ears/edges of the pad backing plates that slide on those clips
- The back of the pads where they touch the caliper piston and the caliper fingers, if your pad maker’s instructions call for it. Some pads come with shims and say to skip grease on the back, so follow what’s in the box.
Never put it on:
- The pad friction material (the side that touches the rotor)
- The rotor’s braking surface
- Anywhere it can drip or fling onto those surfaces
A thin film means thin. More grease doesn’t work better, it just collects dirt and gives it a better chance to migrate where it shouldn’t be. Wipe your gloves before you handle the new pads. If you do get grease or brake fluid on the friction material, don’t try to clean it and hope. Contaminated pads should be replaced. A rotor with grease on it can be cleaned with brake cleaner and a clean rag.
Step 9: Put it back together
- Install the new abutment clips in the bracket, then the new pads, with the wear indicator in the same spot as the old one. Some pads are marked inner/outer or left/right.
- Slide the caliper over the pads. It should go on without a fight. If it won’t, the piston isn’t all the way back or a clip is out of place.
- Install the caliper bolts and torque them to spec. If the bolts had thread locker on them from the factory, the service manual will say whether to reapply it.
- Double-check the brake hose isn’t twisted and isn’t rubbing on anything when you turn the steering.
- Do the other side the same way. Pads should always be replaced in pairs on the same axle, both sides at once.
- Put the wheels back on, snug the lugs in a star pattern, lower the vehicle, then torque the lugs to spec in a star pattern.
Step 10: Pump the pedal before you move
This step matters more than any other. After you push the pistons back, the first push of the brake pedal goes almost to the floor because the pistons have to travel back out to meet the pads. Sit in the driver’s seat with the engine off and pump the pedal slowly until it’s high and firm. Then check the reservoir and top it off to the MAX line with the fluid type printed on the cap. Don’t mix fluid types.
If the pedal still feels soft or spongy after pumping, don’t drive it. Something’s wrong, maybe air in the lines or a leak, and that needs to be found before the vehicle moves.
Step 11: Bed in the new pads
Bedding in (also called burnishing) heats the pads and rotors gradually and lays down an even layer of pad material on the rotor. It makes the brakes quieter, smoother and stronger, and it helps prevent vibration. Follow the pad manufacturer’s procedure if it came in the box. A typical street pad procedure looks like this:
- Find a safe, empty road where you won’t hold anyone up.
- Make about 10 moderate stops from 30 mph down to about 10 mph, with roughly 30 seconds of driving between each to cool off.
- Then a few firmer slowdowns from about 50 mph down to 10 mph.
- Drive easy to let them cool, and don’t sit with your foot hard on the brake while the brakes are hot. Holding a hot pad against one spot on the rotor can leave a deposit that feels like a warped rotor.
Some smell is normal the first few stops. Go easy for the next few hundred miles, and avoid towing or hauling heavy right away.
Common mistakes
- Grease on the friction surface. Ask me and my pole barn how I know. Back of the pads and the slides only.
- Not pumping the pedal before driving off. The first stop out of the driveway won’t be there.
- Hanging the caliper by the brake hose.
- Letting the reservoir overflow onto painted parts.
- Skipping the slide pins. A seized pin wears out your new pads fast.
- Reusing worn-out clips and hardware when new ones came in the box.
- Blowing off the brake dust with compressed air.
- Doing only one side. Pads go in pairs on an axle.
- Guessing on torque, especially with lug nuts. Use the spec and a torque wrench.
Is it worth doing yourself?
For a lot of cars and trucks, a front pad job is one of the most doable brake jobs at home. Take your time on the first one, do one side at a time, and you’ll have it figured out. What’s not a beginner job: anything where a brake line has to be opened, a caliper is leaking, the pedal is soft, or the ABS light is on. Those need a proper bleed or diagnosis. If you’re already under there, it’s a good time to check the rest of your fluids and look over the tires with my guide to reading a tire sidewall. If you haven’t tackled it yet, changing your own oil is the easier one to start with.
Sources
- U.S. EPA, “Current Best Practices for Preventing Asbestos Exposure Among Brake and Clutch Repair Workers” (wet-wipe method, no compressed air, do’s and don’ts for home mechanics): epa.gov
- Brake Parts Inc., Technical Bulletin 18-16, “Floating Caliper vs. Fixed Caliper Operation” (where to lubricate, silicone-based lubricant, why seized slide pins wear the inner pad): brakepartsinc.com
- PowerStop, “How to Lubricate Your Brakes” (lubricant placement, never on the friction side, petroleum grease and rubber seals): powerstop.com
- HELLA Tech World, “Changing the brake fluid” (brake fluid absorbs moisture, lowered boiling point, damage to paint): hella.com
- Wagner Brake, “Burnishing Brakes & Bedding Brake Pads”: wagnerbrake.com
- Phoenix Friction, “Bedding-In Process for Brake Pads and Rotors” (30 mph and 50 mph stop sequence): phoenixfriction.com
Follow Danny on X: @djgaston19
From https://www.djgaston.com/replace-brake-pads/ · Updated November 19, 2026